Note: This is a Ghostbusters:Afterlife spoiler-free zone, so don't
worry if you haven't seen the movie yet! I will only be referencing the
mini-Pufts from the trailers.
****
****
If you've been here a while you may have noticed I like
Ghostbusters.
(My
last name
even means "gatekeeper.")
... and that I have a particular fondness for that deliciously evil
marshmallow, Stay Puft.

(Get you a hubby who jumps onboard the fandom train with both feet,
choo choo.)
So when the trailers for Ghostbusters: Afterlife started dropping, I started planning. John and I rented a theater for opening night, invited friends, and even made everyone a cute movie-night gift to celebrate:
At first I was bummed that the release date just missed Halloween, but then I realized I could take advantage of the timing and make Christmas ornaments.
So I did.
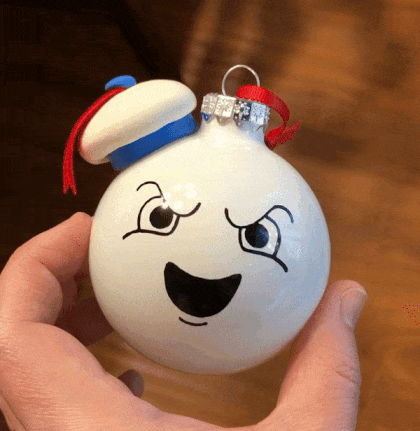
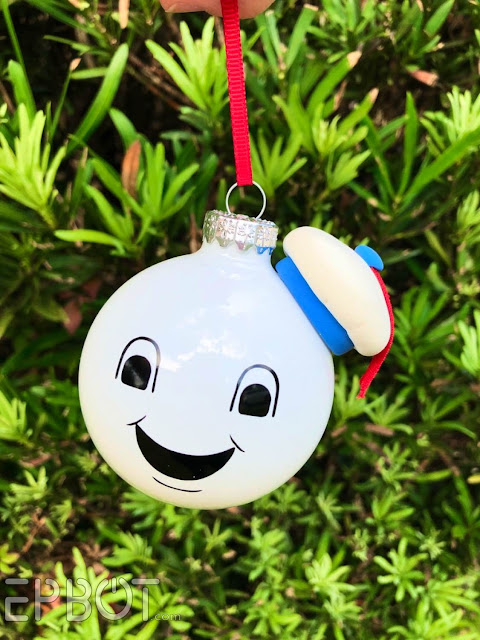
Ta-daaa! Isn't it ADORABLE?? This is either classic Stay Puft or one of the
new mini-Pufts, your choice.
And yes, the hat is slightly squishy. WOOT WOOT.
This is a surprisingly relaxing and relatively easy craft, since I'm about to give you our template cut files for the faces. I'll also include the printable seals John made for the gift bags, so you get the whole package, pun intended. I recommend making an entire Gozer army to festively unleash on your favorite friends and sub-creatures.
You... you've earned it.
John and I shot a quick video tutorial for y'all last night, so here's that first - but you can also keep scrolling for my usual step-by-step photo tutorial. Because I got you, boo.
John and I shot a quick video tutorial for y'all last night, so here's that first - but you can also keep scrolling for my usual step-by-step photo tutorial. Because I got you, boo.
You Will Need:
- Model Magic clay in both white and blue:
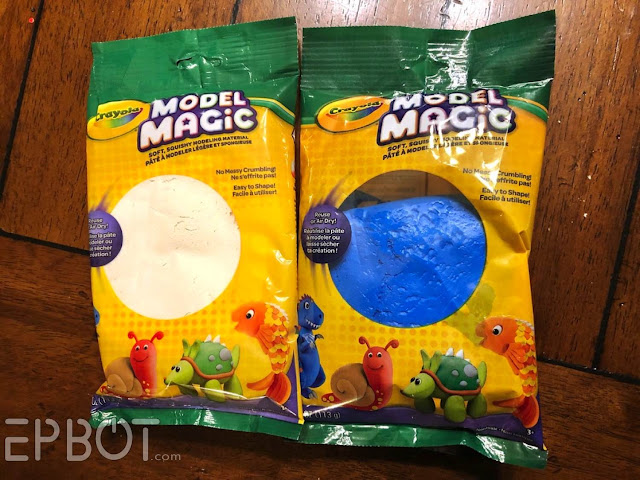
You can find this at any craft store. One package of white should make
at least a dozen hats.
- White ornaments:
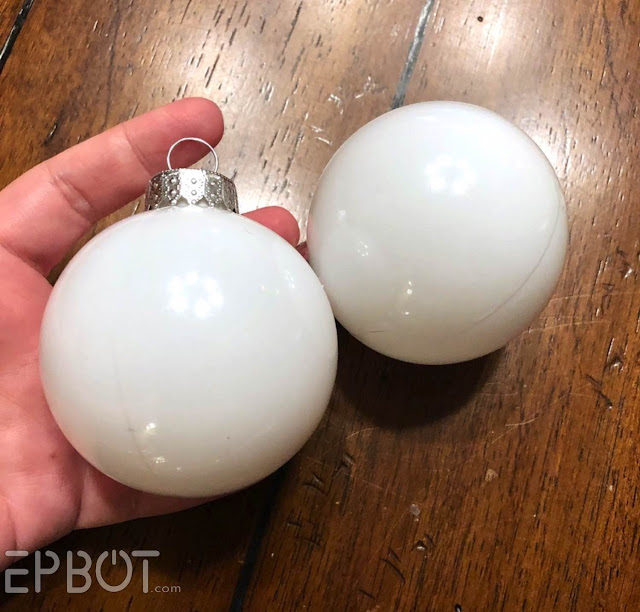
These plastic ornaments are 2 for a dollar at Dollar Tree, a great
option if you only need a couple.
If you're making an army, though, buy in bulk. We hit a sale and
got this bucket of 12 for $5:
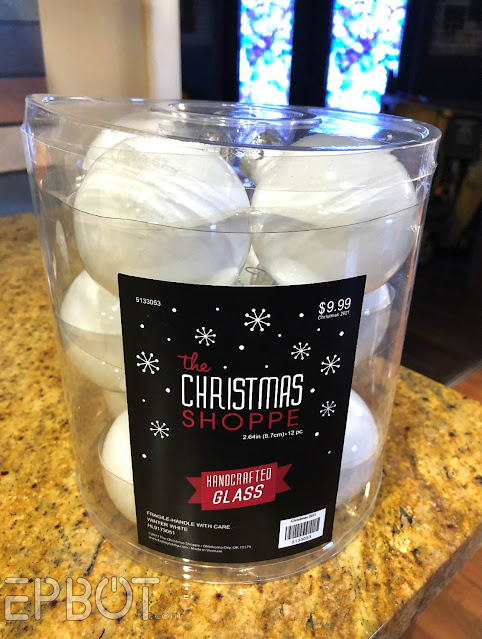
These are glass, which has the advantage of no side seams, and they
hang a little better than the plastic ornaments. The disadvantage, of
course, is that glass shatters quite spectacularly when dropped on
concrete. Something I demonstrated to a rather large crowd outside the
movie theater. Oops.
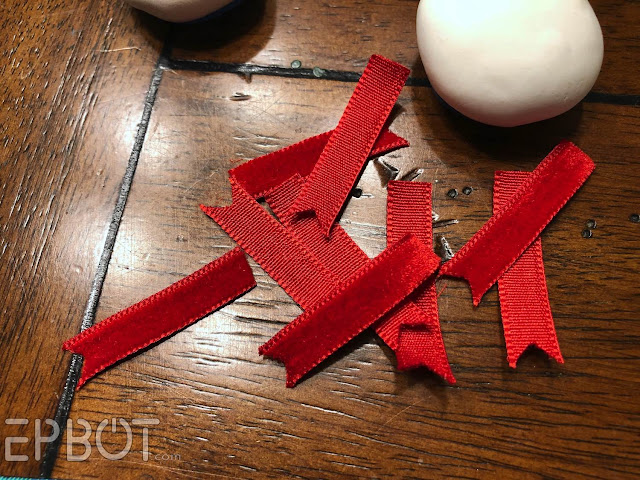
- Red Ribbon
- Red Ribbon

I used a velvet ribbon I already had - which gave a nice holiday touch
- but you can use any kind.
- A cutting machine & black vinyl - OR - black craft paint for the faces
- A cutting machine & black vinyl - OR - black craft paint for the faces
-Hot glue & E-6000
The hardest part is making the little hats, but lucky for us, that's
also the fun part:
Who doesn't love playing with squishy foam clay?
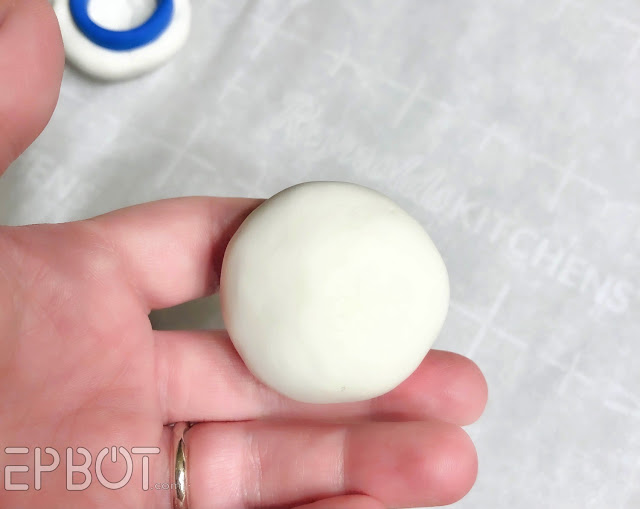
Roll out a small ball of clay, then start rounding and flattening it,
so it looks like a mushroom cap. Or a poofy beret. Pay attention to
the edges; you want those as smooth and rounded as possible.
Side reference. We're getting to the blue band next.
Roll out a thin snake of blue clay, then use your ornament to flatten
it slightly, like so:

None of this has to be perfect, by the way. My hat sizes varied
WILDLY, and none of my blue bands were very even.

See?
But that's ok, it's still going to look great, I promise.
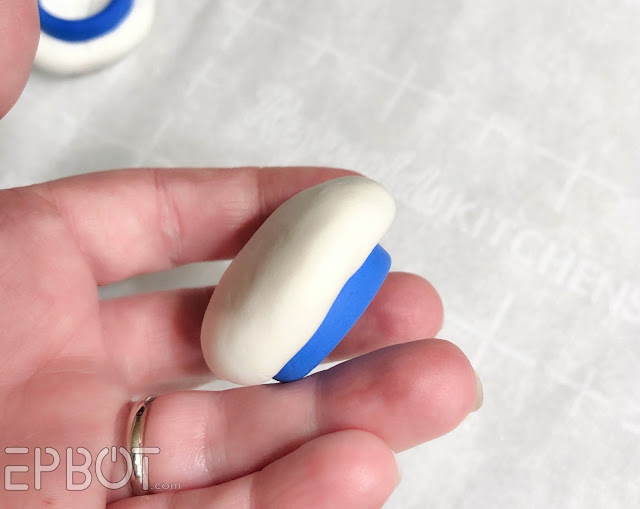
Use a butter knife to cut off a strip of your flattened blue band, and join the ends together to form a ring.
Now carefully drop the blue ring onto the underside of your poofy
beret:

Model Magic bonds instantly to itself, and will NOT let go, so once
you drop that ring it's on to stay.
Turn your hats over and let them dry resting on the blue brims. I initially had them drying cap-side down, but that flattened and wrinkled the hats. So don't do that.
Model Magic takes up to 3 days to fully cure, but I was in a rush, so I only let them dry overnight. The clay was still malleable, but mostly safe to handle. So I think that worked fine?
Cut your red ribbon into small sections - about 1.5 inches - and give one end a V cut:
Hot glue the ribbon ends to the middle of your hats.
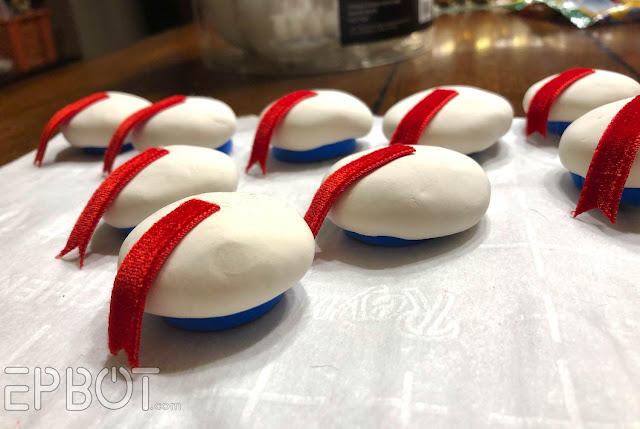
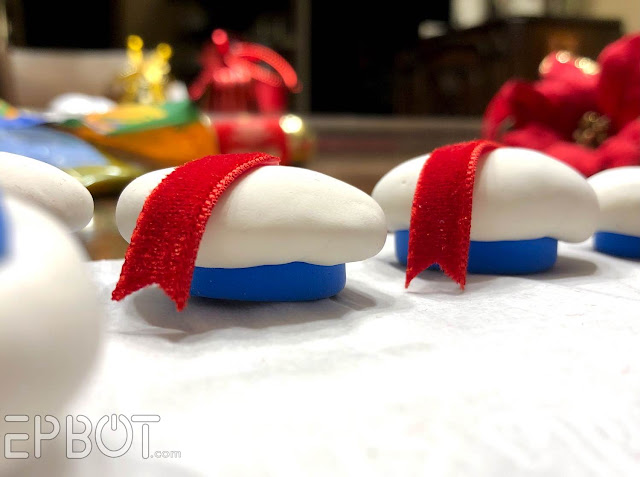
Finally, pat a small ball of blue clay in the middle, flattening it so
it's half over the ribbon and half on the hat:
They kind of look like cupcakes! (Drat, now I want to
make Stay Puft hat cupcakes.) And see what I mean about my sizes being
all over the place? They all look fab in the end, though, so don't
stress over getting them all the same.
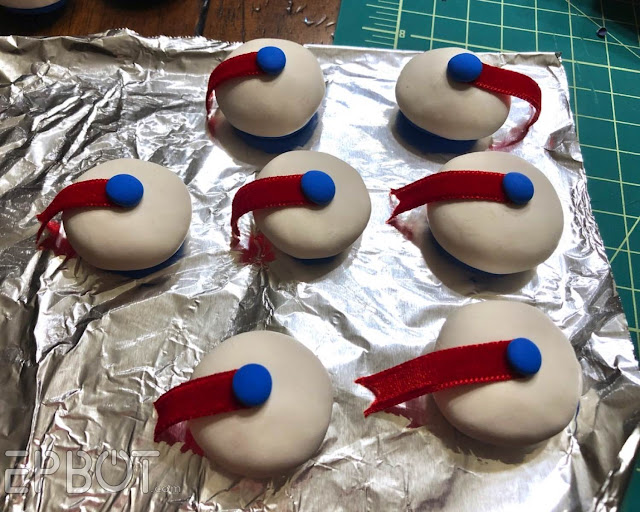
That's the hard part done, now let's make the faces.
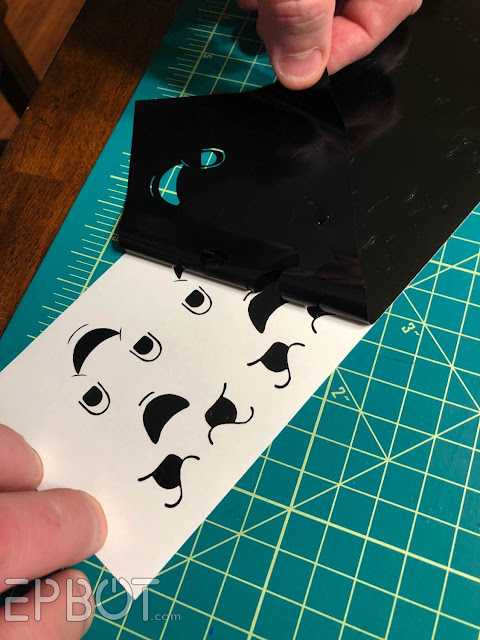
Right-click and save this cut file to your desktop:
That's the hard part done, now let's make the faces.
Right-click and save this cut file to your desktop:
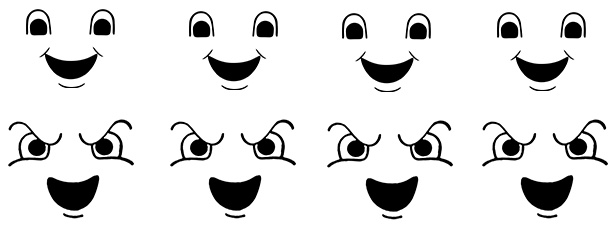
Then you can upload it directly to Cricut's Design Space. (I
assume/hope it also works for other cutting machines.)
We used glossy black vinyl, but any sheen will work:
We used glossy black vinyl, but any sheen will work:
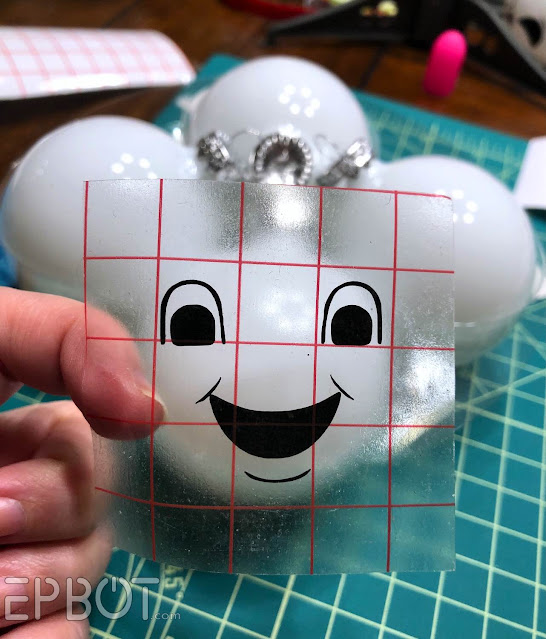
"I tried to think of the most harmless thing..."
If you don't own a cutting machine, you can paint on the faces with
a paint pen or brush.

Last step is to glue the hats on! I recommend a combo of hot glue
and E-6000, since hot glue can pop off if someone grabs them by the
hat. Another thing I learned the hard way on movie night. Arg.

"Well there's something you don't see everyday."
I also added a thin red ribbon hanger, but that's optional.
I'm glad a friend convinced me to make all the ornaments double-sided;
every time I pick one up I have to twist it back and forth and
grin:


The hats make the ornaments hang a little wonky, but only a
little:

Maybe the tilt gives them more personality?
Sure, we'll go with that.
:)
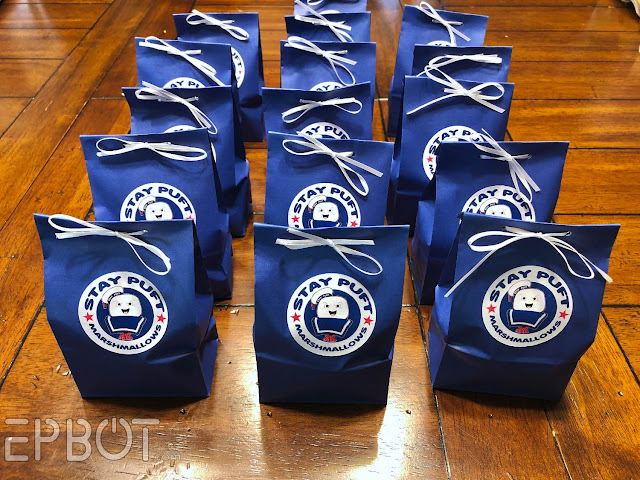
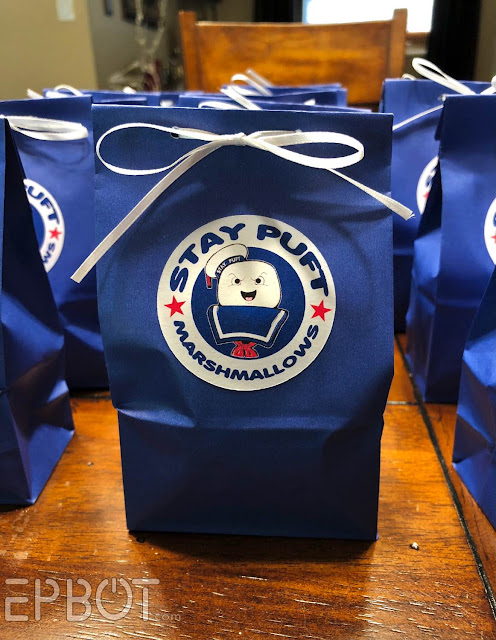
To give ours away we added Stay Puft stickers to blue gift bags. I
padded the bags with a little tissue in the bottom, folded over the
top edge, punched two holes, and tied with ribbon:
Fortunately the one I dropped was still in the bag, which contained
the explosion.
Here are the sticker seals John put together, if you'd like to make
your own gift bags:
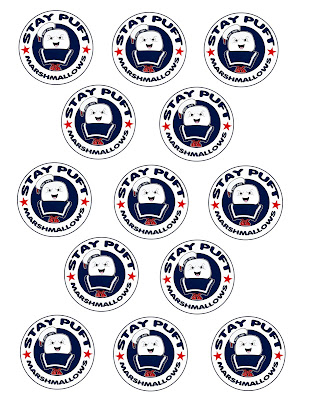
We used the "print then cut" feature on our Cricut with sticker paper, but you can always cut by hand and use a glue-stick instead.
"Yes, have some."
I hope this makes my fellow Ghostbusters fans smile! I'll
probably be posting my thoughts on the new movie soon, but don't
wait for that, just go see it. Then we can compare notes. ;)
******
P.S. I've been brainstorming how I'd do a Ghostbusters mini tree this past week, which is sooo tempting... and I just found this tiny P.K.E meter on Amazon, which isn't helping:
P.S. I've been brainstorming how I'd do a Ghostbusters mini tree this past week, which is sooo tempting... and I just found this tiny P.K.E meter on Amazon, which isn't helping:
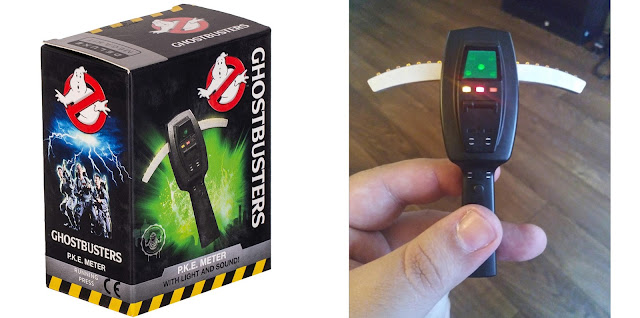
It's less than $10, moves, lights up, and even has animated dots on the
screen! This would be an amazing ornament, right? Dangit. Now I have to find a spot for a Ghostbusters tree...


Those are adorable! I saw the movie on Saturday and loved it!
ReplyDeleteI'm definitely seconding the Ghostbusters tree idea! So many fun possibilities (Like, what if the proton stream was the garland?!?)
ReplyDeleteCame here to say the same thing! Must be the name. :)
DeleteSO CUTE! Thanks for the generous tutorial!
ReplyDeleteOr the proton stream was lights and you had slime Garland. You should. Kitchen needs a little tree. .
DeleteI'm just sayin'...marshmallow fondant bears more than a passing resemblance to modeling clay, is easy to make, and is spectacularly on-theme for Stay-Puft cupcakes.
ReplyDeleteLOL as i read this i thought 'next year it'll be a ghostbusters tree...'
ReplyDeleteRenting the theater always seemed like an impossibly rich person thing, like Daddy Warbucks in Annie, but we did it once over the pandemic too and it wasn't bad at all! It was fun having a theater of just our friends geeking out. (We did it for Black Widow.) I wish I'd thought to make goodie bags, though!
ReplyDelete