Happy Tuesday, Heffalumps and sugar lumps! I'm back with more from the Pooh baby shower John and I are planning for a friend, so if you missed our backdrop builds earlier, go see. They're pretty rad.
Today, we're talking party favors. I have two options for you: a traditional favor box with a matching earring holder, and some sweet floral headbands I made for the guests to wear.
Today, we're talking party favors. I have two options for you: a traditional favor box with a matching earring holder, and some sweet floral headbands I made for the guests to wear.
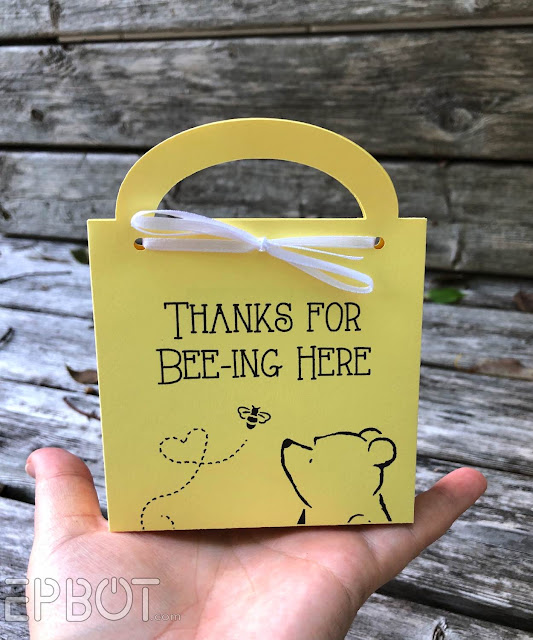
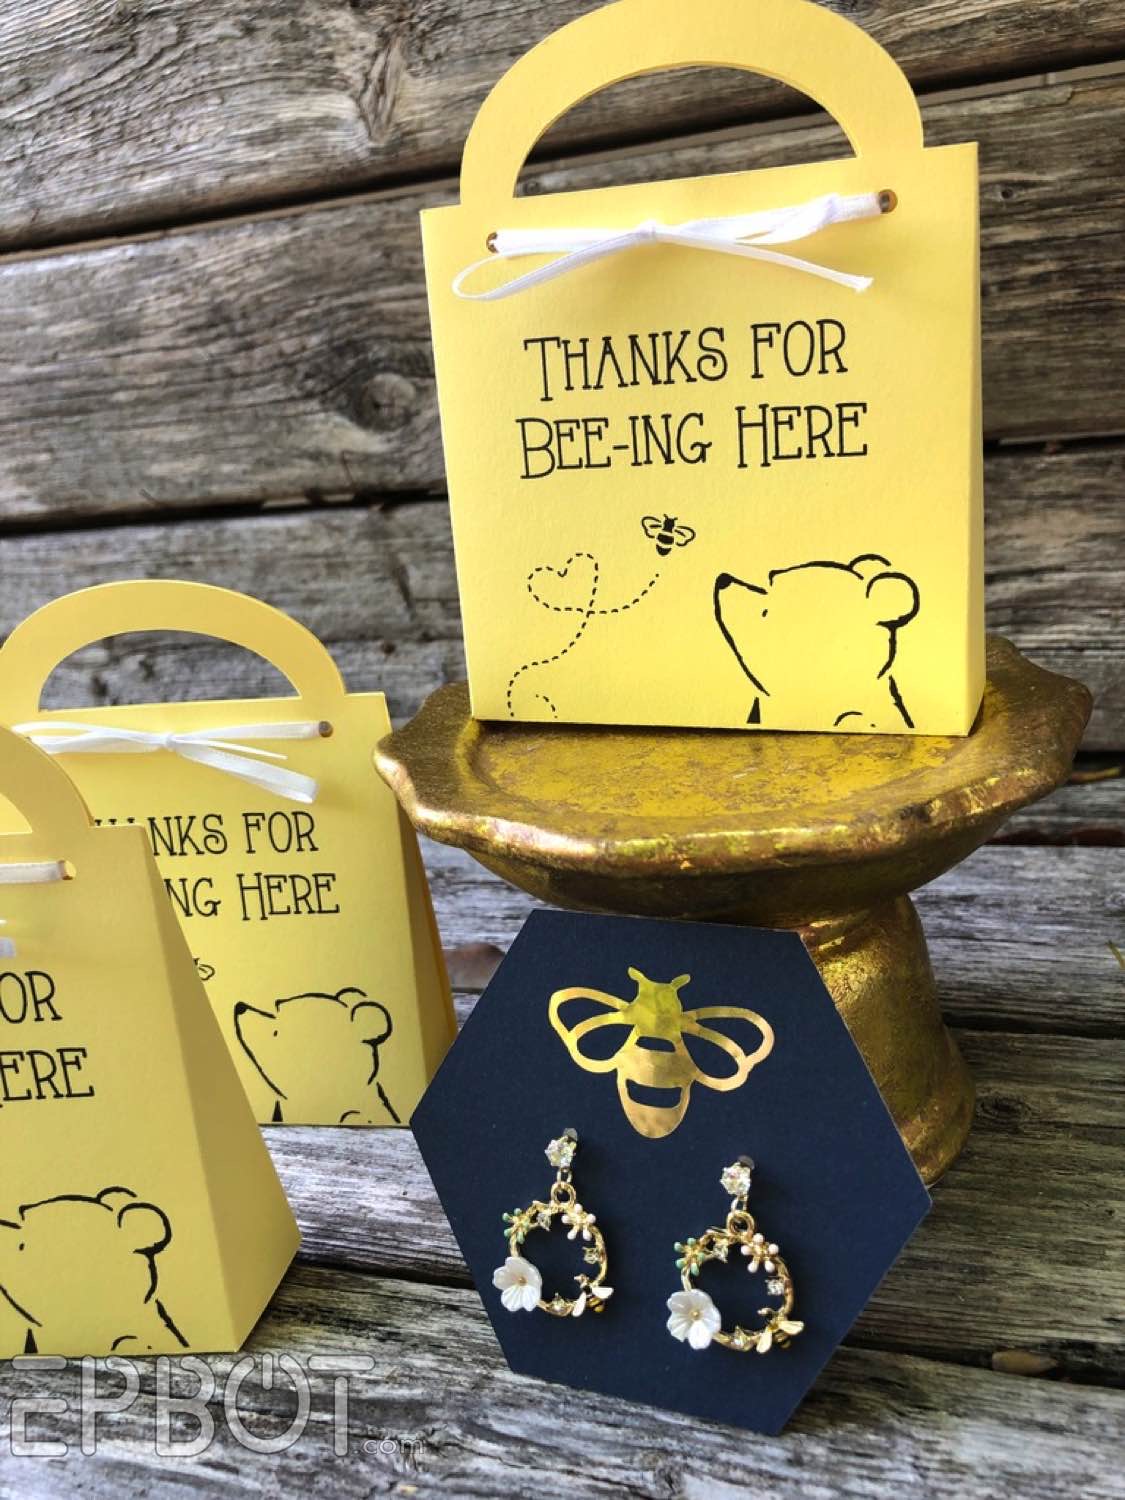
There are lots of great box templates out there, but John took it as a personal challenge to design his own from scratch. I'm planning to hang these on a small clothesline, so he made a purse style with a handle:
Here's the side view:
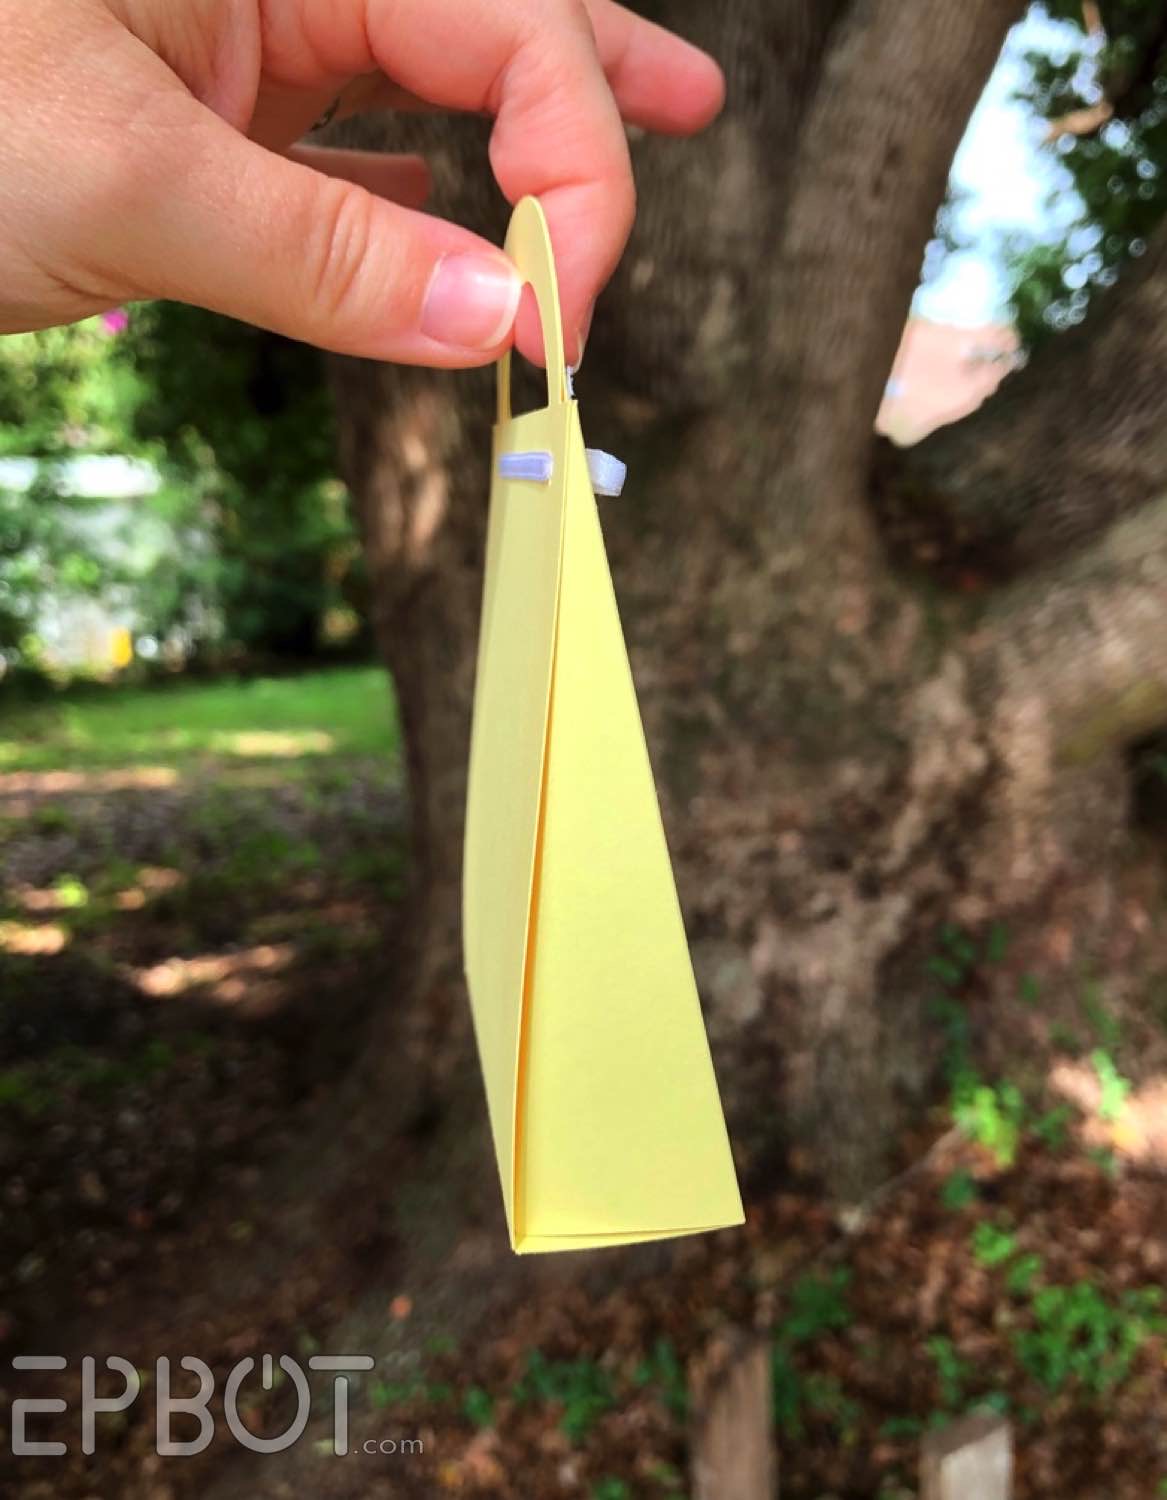
No glue required; the ribbon threads through the side pieces to hold it all together.
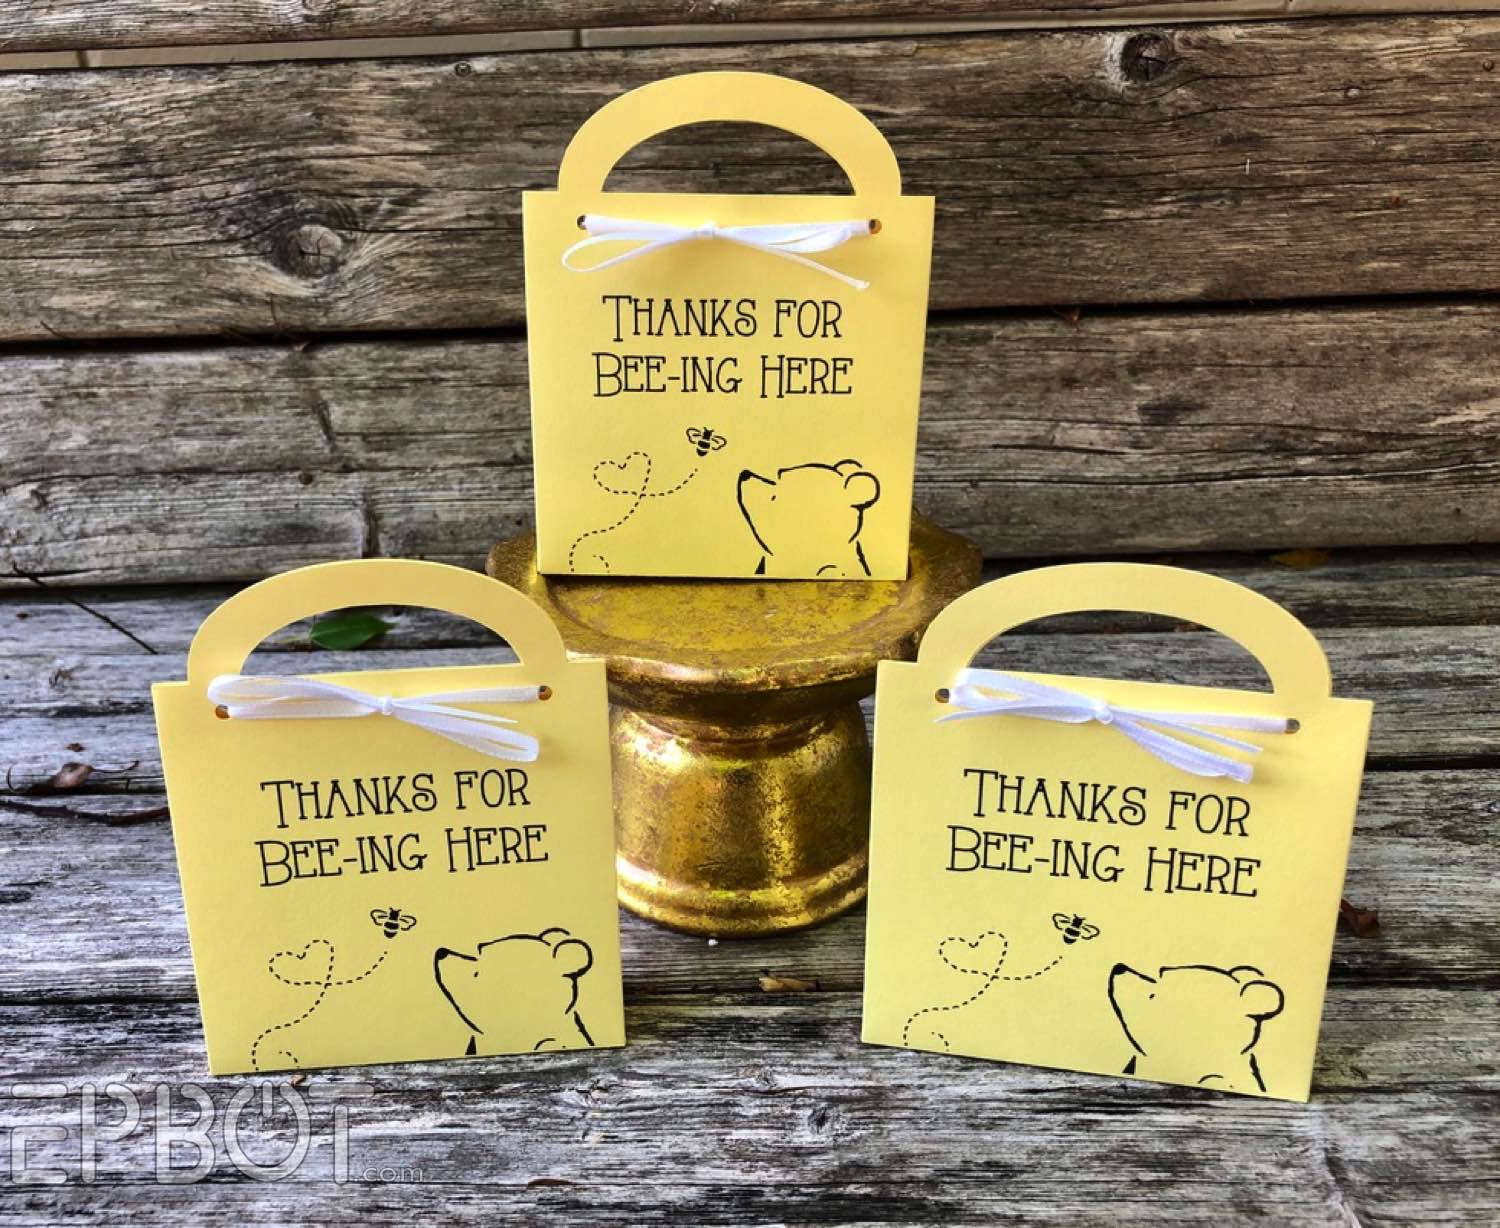
I know it looks tiny, but these are the perfect size for a tube of Burt's Bees lip balm and a few candies.
I know it looks tiny, but these are the perfect size for a tube of Burt's Bees lip balm and a few candies.
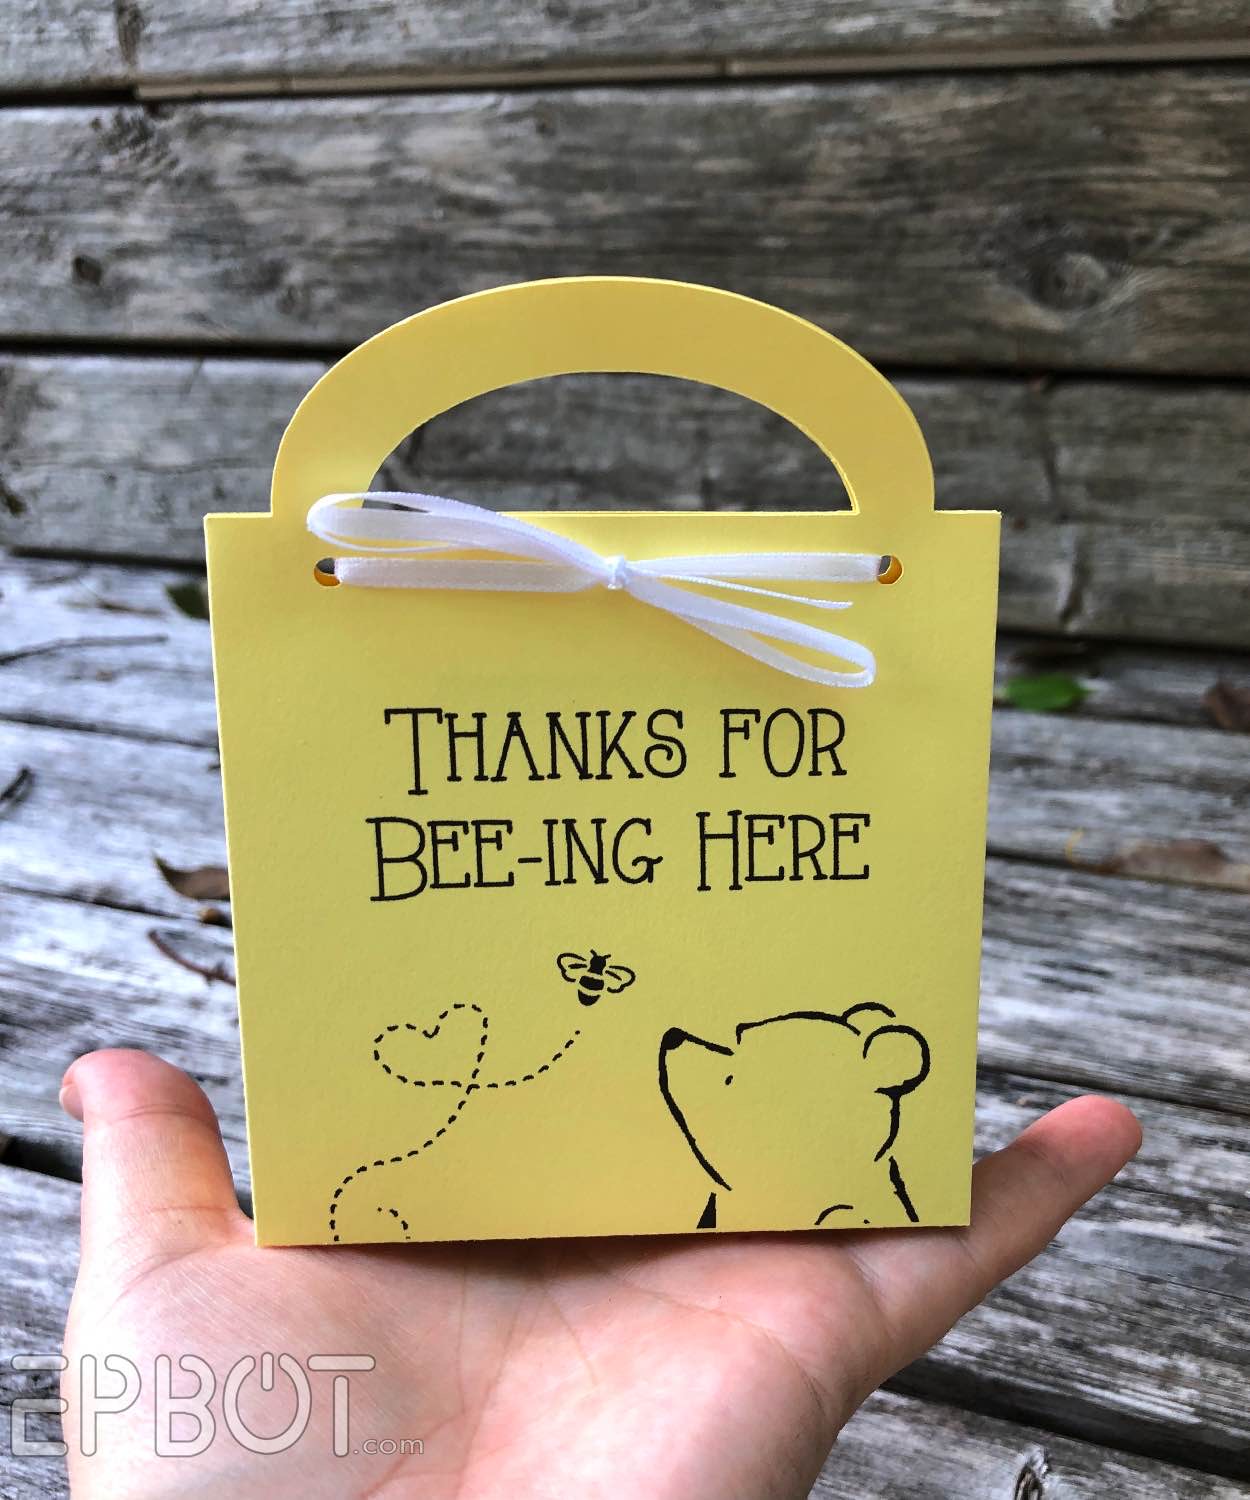
OR, you can do what we did, and use them to hold a pair of earrings.
These earrings:
These earrings:

OooOOOooh.
Right?
Right?
We made the the card backers using our Cricut, and the earrings I purchased from Shein. Y'all, these earrings cost $1 per pair. This isn't sponsored and I can't vouch for quality, but I can tell you they look friggin' AMAZING for one dollar earrings. (See the tiny bees? SO CUTE.)
They look especially high-end on our backer cards, if I do brag on myself:

They look especially high-end on our backer cards, if I do brag on myself:

This next one was just a prototype, but white-on-white card stock looks kind of amazing, too:

Very minimalist. I dig it.
So that's another option if you don't have vinyl or colored card stock on hand.
So that's another option if you don't have vinyl or colored card stock on hand.

Aren't these sweet together? The earrings fits like a glove inside the favor box, and I doubt anyone would guess both pieces only cost about $2 to make.
John worked really hard on these templates, so of course I'm going to share them with y'all for free. Ready to clicky-click?
The Pooh graphic is a cropped and modified photo from Disney, so I won't be including that, but here's the print template without Pooh:

Plus this way it works for Pooh parties and more generic honey bee themes.
Print that on light-colored card stock, then use John's cut file here to cut with your machine:

Plus this way it works for Pooh parties and more generic honey bee themes.
Print that on light-colored card stock, then use John's cut file here to cut with your machine:

This is made for standard 8.5x11 paper, btw.
If you don't want to bother with printing a design first, you could always add a sticker or stamped design afterward instead.
If you don't want to bother with printing a design first, you could always add a sticker or stamped design afterward instead.

Here's what the box should look like after cutting.
Next grab a ruler and something pointy, and score these fold lines:
Next grab a ruler and something pointy, and score these fold lines:

You'll notice John added tiny little notches in the cut file to help us line these up. SUPER handy.
Next fold, thread an 1/8 inch ribbon through the holes, and tie a bow.
Done!
Next here are the earring backer card and bee template cut files:


My watermark was in the way so I left it off. Just give us a link back if you re-post, k?
I'm pretty sure those don't need further instruction, but hit me up in the comments if you have questions.
Right. Let's move on to my next DIY pretties: floral headbands.

Look how sweet. Aaaaah I love these so much!

The behind-the-scenes chaos.
The main materials here are floral garlands from JoAnns, which were "Buy One, Get TWO Free" during their Spring Fling sale. (That sale's over, but they're always running more, and have great coupons on their app.) So for $15 I got three 6-foot garlands, one each in blue, yellow, and white.
WOOT.
WOOT.
Any silk flowers will work, but I like garlands because there are no stems to cut off, and they have lots of extra greenery and non-flower spriggy bits, which are great on headbands.
Speaking of, I bought this 30-pack of white satin headbands from Amazon for $8:

I recommend fabric-covered bands; the glue sticks better. These are super flexible and comfy even on my giant noggin, so highly recommend.
Other than flowers and headbands, all you need is hot glue. Easy-peasy.
To conserve flowers, I bunched just a few off to one side like a fascinator:

Which turned out so much nicer than I hoped! (Think I'm claiming this one, I love the yellows.)


I made 4 different color combos for guests to choose from, to match their outfits: yellow, blue, white, or all three colors together.

We invited guests to wear matching colors if they liked, so I can't wait to see the group photos!
And of course Mom-To-Bee gets a full flower crown:

What I love about these is you can wear them like a headband OR tipped forward so they look more like a crown:

This works for the smaller ones, too; they all look great both ways.
I've made 16 headbands so far, and still have about half of my garlands left. So if you catch a deal like I did on the florals, then these headbands could cost you less than $1 each to make. Dang, gang. Talk about serious mileage for your moolah.
You probably don't need a step-by-step tutorial for these, but here are a few helpful tips:
- Glue some leaves to the flowers first, then glue the leafy flowers to the headband. It looks more natural that way.
- Tip the flowers forward slightly, don't stand them straight up.

- Once all your flowers are in place like this, cover the back with a few more leaves:

It finishes off the back nicely and hides the hot glue blobs.
And that's it! Listen, I was super intimidated by these headbands - you know how I overthink floral arrangements - but this was actually fun to do, and relatively painless. Also, SO worth it for the end results.
I'm storing the finished headbands on a skinny cardboard box, which keeps them from getting smashed:

My Log O' Flowers.
I'm hoping to update with final party photos later, but for now, I hope you enjoyed the Shower pretties!
Um...
::trying to resist the urge to add more pretty things::
::failing::
GAH
... OK, because I can't help myself, let me end with just one more:
I'm hoping to update with final party photos later, but for now, I hope you enjoyed the Shower pretties!
Um...
::trying to resist the urge to add more pretty things::
::failing::
GAH
... OK, because I can't help myself, let me end with just one more:

BEHOLD MY BEE HIVE
Do you like? Everything except some of the flowers is from Dollar Tree! I even made the felt bees from DT pom-poms. (The bee butt sticking out of the flower brings me much joy.) This will be the centerpiece on the food table.
Let me know in the comments if you'd like a tutorial, and I'll put it on the list for later.
K, now I'm done, honest. I hope these made you smile and think of sweet things, my friend.
TTFN!
*****
If you like the crafts and tutorials and free templates I share here, and would like to help keep them free, then you can support me and John directly through Paypal! Whether it's a one-time tip or a monthly donation, every dollar is dearly appreciated, and lets us devote more of our time and energy into this community.
And hey, if you don't have cash to spare, no worries! Just your being here is more than enough, so thanks for sticking around. ::mwah::


I'm having a bit of a tough week, and the "my friend" at the end gave me a big lump in the throat and tears standing in my eyes. How wonderful to be even a virtual friend of Jen and John!
ReplyDeleteMay I ask why you didn't have the Cricut score your lines for you? I *think* you can even load the scoring stylus and cutting blade at the same time, so you don't even have to constantly change the tool heads out. (I have the Maker which has a different tool mount, so forgive me if this detail's wrong.) I've had good luck with the stylus on plain cardstock and paper, though it's not great on foiled papers, and it's so much faster than I can do by hand, even with excellent guide marks.
ReplyDeleteI had the same thought. It would be easy to add.
DeleteI also think the shiny bees would be pretty if done in foil by the Cricut. I use Foil Quill, but you could do the same thing with Cricut's foil too! And it saves a step!
Whoa, it can do that?? Lol, I have an old Cricut Air and had no idea, not sure if our model does scoring or not. I'll be checking now!
DeleteEven though I can't foresee myself in charge of any parties that would need anything like any of this, I still love seeing all the pretty and fun and amazing things you create! You are so creative and amazing yourselves, too! Thanks for the lovely eye candy :-)
ReplyDeleteNow all you need is a 60's beehive hairdo. I think you'd look fabulous, especially with your gorgeous floral headband!
ReplyDeleteI LOVE all of this! Karl & I are the fans that sent you honey from our beehives a while back :) I do have a question. Are the flower colors of blue and yellow in any way inspired by Ukraine?
ReplyDeleteThe Ukraine colors are purely coincidental, though I admit they make me smile. The shower colors are navy, teal, baby blue, and yellow. I'm planning to wear my Ukraine colors to the shower, though, with a teal/blue cardigan and yellow dress.
DeleteThese are all great! When you posted the earring favor box on FB, I thought "wow, that's a fancy favor." $1 each?? And that beehive is completely adorable!
ReplyDeleteI like how the headbands in a nice box could also double as a centerpiece on the table. Since they basically look like a box for flowers. Maybe put some candles on stands in there or something so that once everyone takes a headband your centerpiece isn't just a empty box?
ReplyDeleteBut i do like the idea of having favor hanging on a line - so easy see all the choices and to grab the one you want.
Oh wow, you're totally right! I like that idea, gonna remember that for next time.
DeleteRandom information you might find useful at some point: The original Winnie The Pook book, including the original artwork, is now in the public domain. Not exactly the same as Disney Pooh, but it's there and it's free and legal to use and modify (and... it's very definitely Pooh; some of the other characters morphed substantially in being Disney-ized, but Pooh is closer). You can find the book on Project Gutenberg if you don't own a copy.
ReplyDeleteThat is VERY useful, thank you!
DeleteI've got to know how you made those adorable bees.
ReplyDeleteOh my goodness, this party is just going to be the CUTEST! I love all the things you've done so far, so much adorable. And yes, we're gonna need to see how to make the bee hive, please
ReplyDeleteJen,
ReplyDeleteI would so love a tutorial on your bee hive. I've seen others but yours is much nicer.
Maureen
P.S. It was great to see you in Pittsburgh!