I don't care how old you are, I bet you have at least a good arm-load of plush toys lying around, right?
John and I love our squishy collectibles. Catbus, E.T., my Firey from Labyrinth, reader-crocheted Epbots and pony avatars... we've got our share for sure. I like to sprinkle them around my office and John's game room, though, so we don't really have a dedicated display spot. However, the last few weeks I've been doing research to help some friends and readers who have a LOT of plushies - an amount you can no longer "sprinkle" - and I've found so many clever display ideas and storage tricks that I have to share. Whether you're a parent wrangling your kids' toy haul or a collector looking to show off your main squeezes, I think these will be relevant to your interests.
So here we go, 10 of my favorite NON-SHELF ways to store and/or display plush toys:
So here we go, 10 of my favorite NON-SHELF ways to store and/or display plush toys:
1) Re-Purposed Curtain Rods:

I love this because it's clever, functional, and cheap. Why dedicate a whole shelf or bookcase when all you need is a simple bar? You could stack these on a wall in place of a bookcase, or put them end-to-end all around the room.
Plus, these can look REALLY high end:
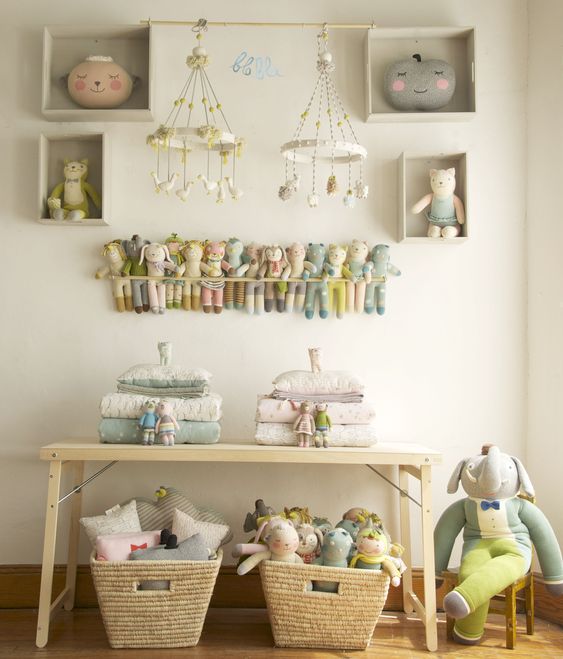
Especially if you're displaying a collection or grouping by color.
Oh, and you can also use towel bars, not just curtain rods!
2) A Tension-Rod Hammock:
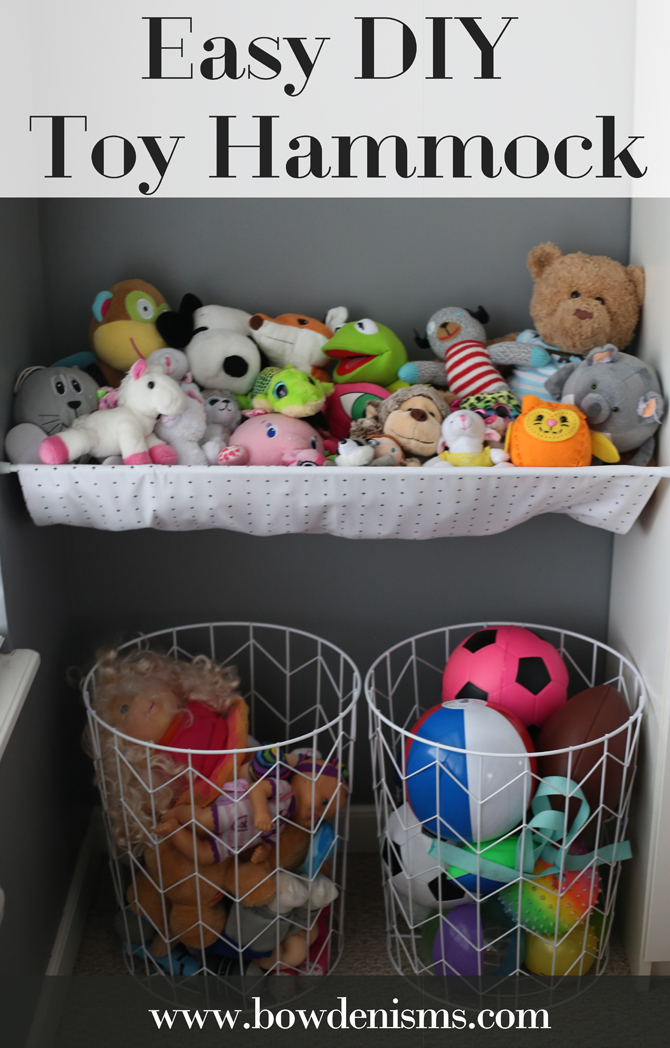
Use two tension-mount curtain rods to make a hammock between the wall and a dresser or bookshelf. Courtney sewed her fabric, but you could use an existing valence for a no-sew option: just slide the 2nd curtain rod through the bottom hem of the valence, and you're good to go.
3) Wire Basket Nightstand:

(Addicted To Bargains)
You probably won't find a "lid" that works as perfectly as this angled tray, but all you need is a tray that's larger than the top edge of your laundry/trash bin. Just add some cabinet bumpers or grippy foam shelf-liner to the bottom of the tray, so it won't slide off.
4) End Table Bungee Cage
Take an existing side table or plant stand and add bungee cords, like this:


