If you've ever spent a full week at Disney World then you know that post-vacay
stubborness: the one where your brain refuses to do anything but look
at pictures and videos and remember all the fun you had, instead of getting
back to normal "real" life.
So I hope you'll continue to indulge me while I get all this magical
wild wonder out of my system.
("NEVAAAAHHH!") ("Quiet, brain.")
That's the
nice thing about being a con photographer: I get to re-live all this
goodness while I work on editing, and that goes triple for video
editing. Exhausting as it is, John and I haven't stopped for a moment since
we got home. So while part of me never wants the work to end, another part
is ready for a nice long nap. ;)
That said, early yesterday we
wrapped our Saturday video, the longest and arguably best one yet. So. You
ready for this??
I've been stretching out my MegaCon posts here since
they've been filling me with much-needed nerdy joy the past few weeks - I hope they've done the same
for you.
So let's jump back in with my final batch of favorite cosplays in our big Saturday video:
That Yzma Mando, y'all. I was howling. And the two-sided Wanda? And the rancor puppet? Sooo goooood.
Remembering all this joy and silliness has been a
life-line when I had shut off the news and even social media for a couple days, just to heal up my soul a bit, get my mental health in order.
I find people in the abstract - or in the news - can make me lose faith in humanity,
but people in reality give me hope. That's what cons are, at their best: a
reminder that there's still love and celebration and community out there.
Every time I get to laugh and play and lock eyeballs with people
being themselves out loud, I know we're - eventually - going to be ok.
For our first convention of 2022 John and I dove in head-first with Florida's
largest, the appropriately named
MegaCon. To give you an idea, Mega is bigger than even Dragon Con, hitting 100K
attendees several years ago and growing steadily up 'til Covid. This year they
came back strong and broke all records with 140,000 attendees - and more than 70,000
of those on Saturday alone. It's big. It's overwhelming. And once you navigate
the hours of traffic gridlock and parking nightmares to get inside, it. is.
GLORIOUS.
The calm before the storm.
John and I attended all 4 days
as Press, and we set a goal of filming, editing, and uploading a new cosplay
video to YouTube every night. It's a massive amount of work for four days in
a row - we both get very little sleep - but also SO DANG FUN. The cosplay, merch, and crowds were all off the charts, and I never wanted it to end.
In
between filming for YouTube I also captured lots of photos and video for
my Stories on Instagram/FB, which some of you have been following. Plus on
Friday we delayed filming for a few hours so John could officially bring out
Boba Vet
to play:
There's an excellent mushroom DIY by Emma of
ystreetstudio
over on Instagram, and as soon as my Craft Night crew saw it, they put in
requests to make our own.
So good, right? And a fairly simply process, so of course I was onboard.
That is, until John and I went to JoAnns and saw the price of those large
Styrofoam balls. o.0
Aw HECK no. Even with one ball making two 'shrooms, this drives the material
cost up to about $15 each! If you're a lone crafter that might be doable,
but our Craft Night averages 4 to 6 people, so... nuh-uh.
(Smaller foam balls cost less, of course, but I wanted nice chonky 'shrooms
like Emma's.)
(Also "Chonky 'Shrooms" is my new favorite phrase.
It's so fun to say! Seriously, try it.)
(See?)
So off to Dollar Tree we went, because I was determined to DIY these
fun guys on a DT budget.
It took a few days and some trial and
error, but y'all, we did it.
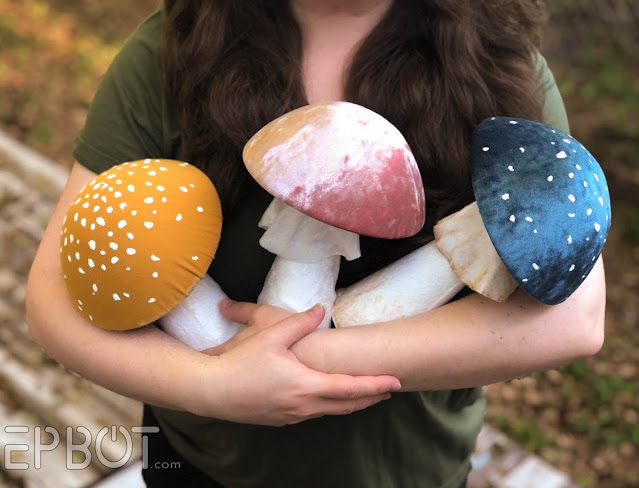
Behold mah big mushy babies!
Hang on, that's not the best photo - it's more for size reference. Here are
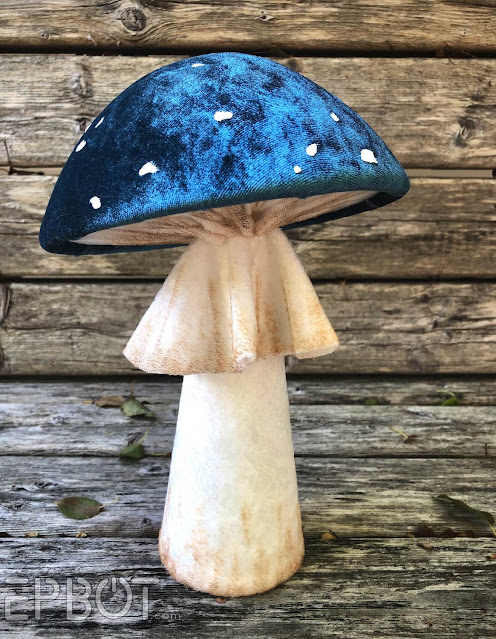
some better angles:
My fairy ring is a-growing.
I love the pleated undersides:
Though you have to get real low to see the yellow one's:
I made each one a little different, so you can see a variety of styles and heights.
My total cost per 'shroom was about $4, and could be even less, depending on
what's in your craft stash. (I had the white velvet, so we only needed to buy the base pieces & top fabric.) These are great for group crafts, or for
amassing your own magical mushy forest.
How's your first week of 2022 been, bots and babes? Mine's been pretty
restful, since the new year is when things finally slow down over
here. Of course I spent exactly two days napping and saying how wonderful it
was to relax, then by day three I was prowling the house looking for
projects. Ha! (Sorry, John.)
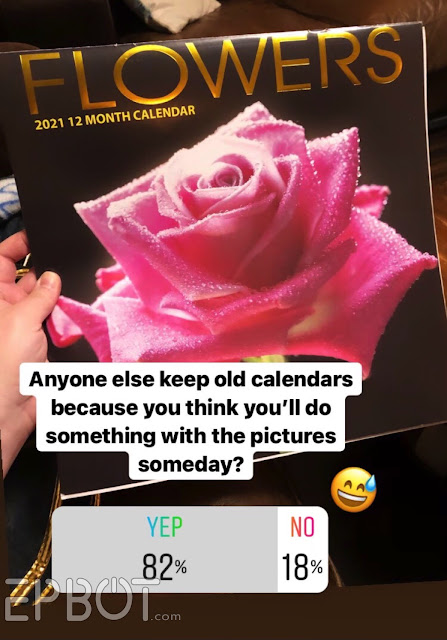
To that end my eye fell on our old 2021 calendar, and I decided to revisit a
paper craft I used to love years and years ago.
Oh good, it's not just me.
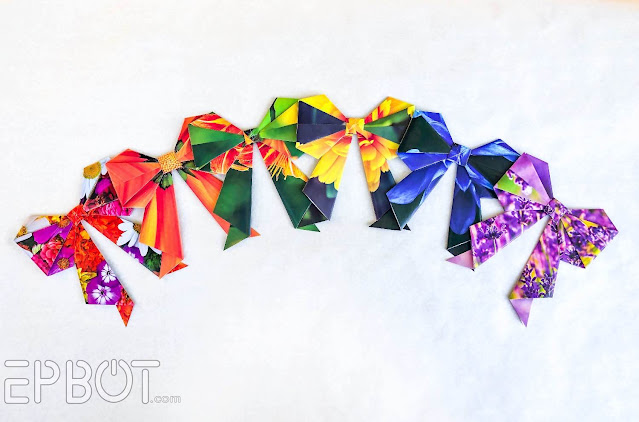
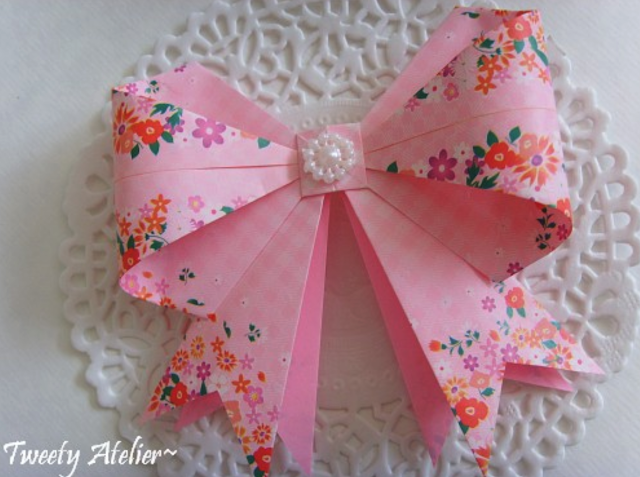
And look what I made!
I originally learned this method using magazine pages from one of my favorite
- and sadly now long gone - blogs,
How About Orange. However the original source
seems to be here, where nothing is in English but the pictures are lovely, so it's
worth a click just for those:
I especially like the little embellishments in the middle, still need to try
that.
Since I don't get magazines anymore I hadn't done this paper craft in ages - but I figure a calendar is basically a big magazine, right?
So after I turned my entire Flowers calendar into bows I thought I might film a tutorial for y'all, since there are a few tricky steps that are much
easier to explain on film. A friend gave me her old Space calendar, too, so for the tutorial I got to make galaxy bows, awww yeeeeah:
Note: This is a Ghostbusters:Afterlife spoiler-free zone, so don't
worry if you haven't seen the movie yet! I will only be referencing the
mini-Pufts from the trailers.
****
If you've been here a while you may have noticed I like
Ghostbusters.
... and that I have a particular fondness for that deliciously evil
marshmallow, Stay Puft.
(Get you a hubby who jumps onboard the fandom train with both feet,
choo choo.)
So when the trailers for
Ghostbusters: Afterlife started dropping, I started planning. John
and I rented a theater for opening night, invited friends, and even made
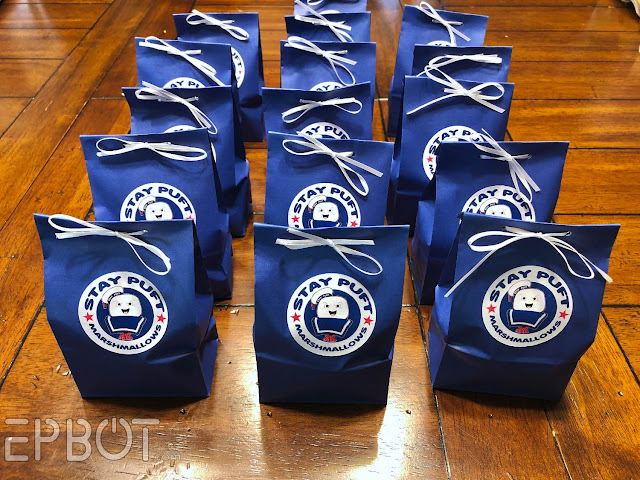
everyone a cute movie-night gift to celebrate:
At first I was bummed that the release date just missed
Halloween, but then I realized I could take advantage of the timing and make
Christmas ornaments.
So I did.
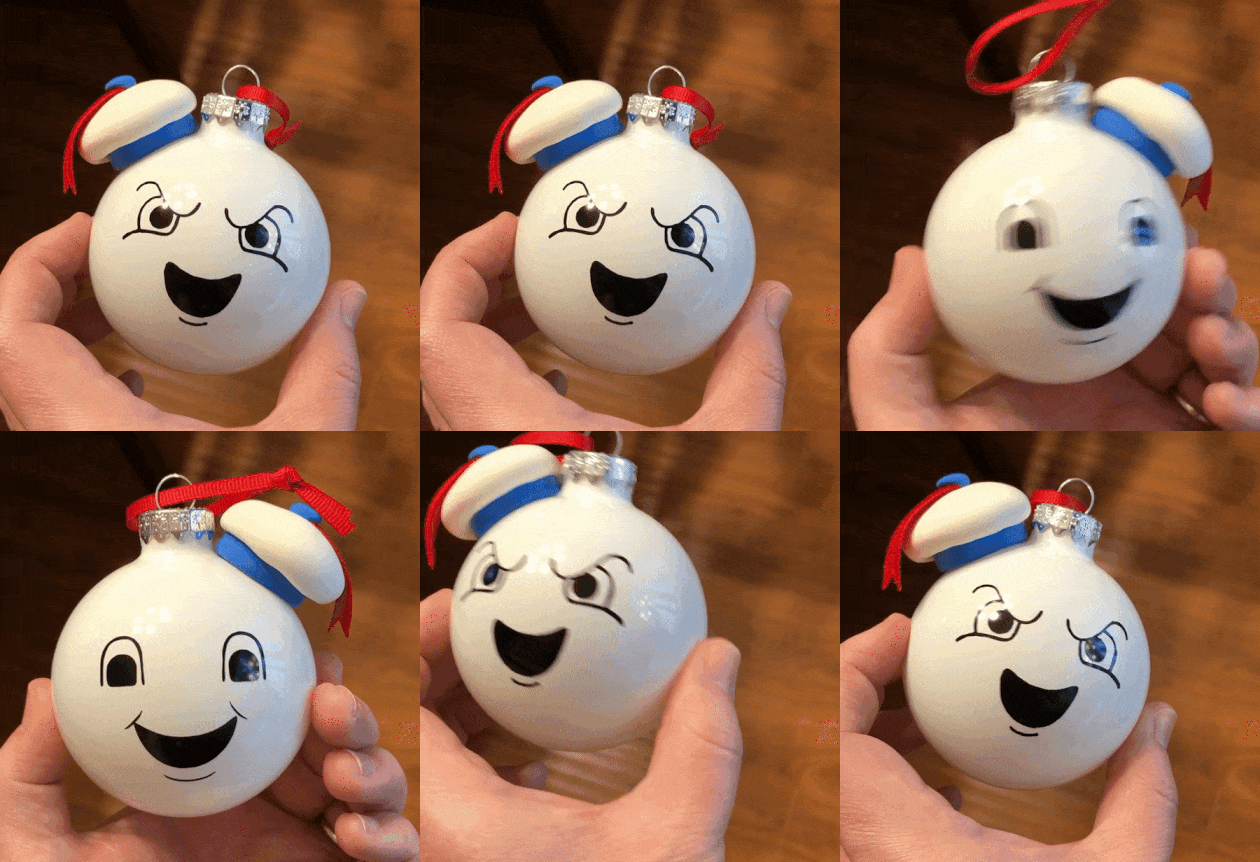
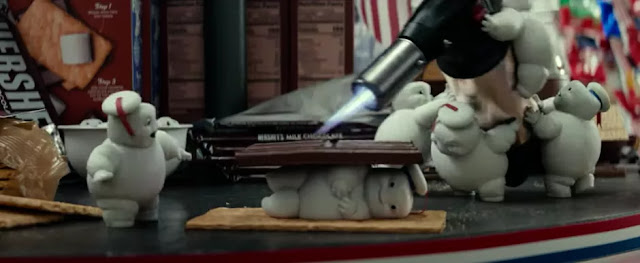
Ta-daaa! Isn't it ADORABLE?? This is either classic Stay Puft or one of the
new mini-Pufts, your choice.
And yes, the hat is slightly squishy. WOOT WOOT.
This is a surprisingly relaxing and relatively easy craft, since
I'm about to give you our template cut files for the faces. I'll also
include the printable seals John made for the gift bags, so you get the
whole package, pun intended. I recommend making an entire Gozer army
to festively unleash on your favorite friends and sub-creatures.
You... you've earned it.
John and I shot a quick video
tutorial for y'all last night, so here's that first - but you can also keep
scrolling for my usual step-by-step photo tutorial. Because I got you, boo.
I have a bunch of cool stuff to show you today, and since I also feel like laughing like an unhinged loon, for kicks I'm throwing in some of my favorite funny TikToks. Yep, I'm outing myself as a TikTok lurker, gang. SHOW ME YOUR FUNNY DANCE MOVES AND/OR PETS. Show meeeee.
In fact, let's start with one of my
absolute favorite people on TikTok:
Sound on for happy lolz. I can't not smile every time I see Chrissy dance; she's so stinkin' talented and pure bubbly joy in a sweatshirt.
*****
Speaking of joy, Naxfx Studios
just dropped her new sewing patterns for these "borbs" on her Patreon, and
I am obsessed:
EEEEEEEEEEEEE
I want to squish them all in
giant bear hugs and play with their twiggy widdle feet. Plus look how pretty:
::attempts to pet screen::
If you aren't familiar with Nazfx and her jaw-dropping plush work, go browse her Facebook gallery for all the pretties. (The giant Luna
moth also stole my heart.) If you'd like to make your own, she even has
patterns and video tutorials for sale on gumroad.
*****
Hang on, I have the perfect cat video to follow that:
John and I are in a community group delivering Valentines to retirement
homes this weekend, so I've been looking for cute-but-easy pop-up cards we
could make on our Cricut.
I thought this would be an easy find,
but WOW was it not. o.0 Nearly all the cards I found were either too
complicated to make in multiples, had their "free" templates locked behind
membership paywalls, or were on blogs so old that the template files were
missing. So after a frustrating hour, I asked John to help me make
our own templates.
Aaaaand here's what we came up with:
Cute, right? I like how the flowers grow as you open the card.
I
also like that the design is all-occasion friendly, because I will for sure be
making more of these throughout the year.
To give proper credit where it's due: I believe the flower pop-up part
originated
on this Instructable
- but it's so old all the graphics and video are gone. It's by far the
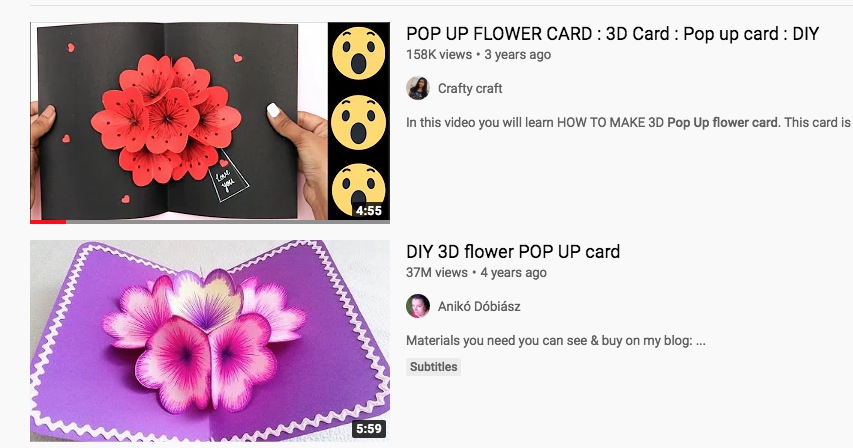
most common design I found on Pinterest and Youtube, though:
From what I've seen all of these versions are hand cut and use a single
layer of paper for the flowers. We changed ours up by adding a
second layer for the flower stamens, designing templates we can cut
on our Cricut, and by making the card itself as a print file.
With
the machine doing all the cutting - and no need to hand draw the flower
centers OR the outside card - these come together pretty fast! We've been
able to whip up over a dozen in a single evening.
Ready to see how? Then here, watch me put one together in under 4
minutes:
And of course you get all our templates for free.
Get ready to clicky-click!
For anything heavier than linens, though, foam board is fragile and easily
dented. No way this would work in a pantry with heavy cans sliding around,
for example.
Other crafters have covered their white wire
shelving
with actual wood, which is plenty durable, but also a huge job that requires power
tools, sanding, staining, and the added expense of a decent grade wood.
I don't know about you, but I don't have that kind of energy or patience
to spend on a closet.
Then a few months ago, as John and I
were re-doing a pantry for a friend, we discovered the best of both worlds:
something as durable as wood, almost as cheap as foam board, and easier
to install than either.
Ready to see?
Ta-daaaaa!
These new shelf covers are a thick durable plastic
- so no more wobbly containers or sticky rust stains on your stuff - and they
look like solid laminate! Best of all, this whole transformation took us less
than 2 hours, and cost about $22 - with enough material left over to do
another closet.
Earlier this month I did a roundup of ways to store/display plush toys I'd found while researching for a kid's room - but wouldn't you know it, NOT ONE of them seemed right for the space John and I were working on. They either hid the toys completely or displayed the toys completely, when we wanted a little of both. We also wanted it kid-accessible, but off the floor and out of the way.
I thought about hanging toy buckets on the wall, but all the large baskets/buckets/canvas bags I found were too expensive or the wrong shape. Then we checked the garden department at Home Depot for metal wall planters, but they were all sold out.
That's when I spotted it. Our cheap, easy, durable solution.
CUE THE HEAVENLY CHORUS
LAAAAAAAA!
(That's my attempt at a heavenly chorus.)
Yep, this $10 plastic planter was the answer to all our plushie problems.
It's pretty rare for John and I to want to make a project twice, but after we finished the Small World clock for our friends Chris & Brandon, we decided we had to do that again. And because I'm me, we had to make it even cheaper and with a few tweaks.
For comparison, here's the first one we made, using a $30 clock from Amazon:
And here's version 2.0, which is a tiny bit smaller, and made from 2 sheets
of foam board:
This time we swapped the gold and silver, and made it a little more 3D by adding a second layer of foam for the eye section, which better mimics the original:
Here's the original from the ride in Disneyland, btw:
The total cost for version 2.0 is about $15 (assuming you have a Cricut & vinyl) and it's incredibly lightweight. I'm talking poster tack would hold this baby up, so it's great for renters or kids' rooms or anywhere else you don't want to hang a heavy clock.
Note: This post will only make sense if you've seen my last mask-making tutorial. So check that out if you missed it!
*****
I'm still a mask-making machine over here, though I only think to take a picture when I'm sending fabric choices out for people to pick their favorites:
I work on masks most nights to relax, while I listen to Critical Role. Not to sell - so sorry to those who've asked! - but to give away. Right now I'm supplying the teachers I know, family, close friends, and everyone we work for during the week. Teachers get the largest sets: 2 frames and 5-6 covers each, so that's been keeping me busy.
Once I'm caught up I'll be making custom sets for any of you Squeegineer winners who want one, so be sure your e-mail entries are in for this month's give-away. Then YOU could get pics like this to choose your favorites:
Here's my latest batch of prints, can't wait to dive in to these beauties:
I'm beginning to understand why people end up with huge fabric hoards. Even with our JoAnn's mostly sold out, there are SO MANY PRETTIES. And I want them alllll.
More importantly - and the reason for this update - thanks to your suggestions our foam frame design keeps getting better and better.
UPDATE: Since a lot of folks were having trouble with the sizing, I've replaced our template files with .pdfs. Updated download links below!
After my foam mask tutorial last month I kept looking for ways to improve the design, because I knew the permanent fabric filters weren't ideal. I was fiddling with a velcro filter that sat on the outside of the foam frame right around the time my friend Traci posted her own upgrade: a full fabric cover that attaches using the existing elastic strap. GENIUS!
I immediately set out to make my own version, and another friend, Karen, helped me figure out the fabric template. So huge thanks and kudos to both Traci and Karen for helping me improve the original design.
Here's how the new masks look:
Can I just say how excited I was to find a galaxy print at our local JoAnn's, when most of the cute fabrics were all sold out? Awww yeeeeah.
This uses the exact same foam frame as before, so don't despair if you've already made some! I'll explain more in the video:
[Quick correction: I use 1/8 inch elastic cord, NOT 1/4 inch. Sorry!]
Or, if you don't have 25 minutes to watch me go through this step by step, you're in luck: John also edited a "short short version" to give you the general gist of how this works in under 3 minutes:
It's been ages since John and I made a home improvement video, but here comes the one that was most requested last year during our renovation blitz: drywall repair.
::Dun Dun DUNNNNN::
::blood-curdling scream::
My friend Corey had a household intercom system he wanted removed, and that meant 5 big holes to patch. So of course we volunteered. What better way to perfect a new skill than by practicing on your unsuspecting friends' walls? :D
::sounds of destruction ensue::
:D
John and I've always said drywall is our Achilles' heel, but since we're also too cheap to hire a pro, we've had to just keep trying over the years. Not to brag, but now I think we've gotten pretty darn OK at it. So this time I had John film me doing every step of one particular patch in Corey's master bedroom (where we could shut the door so I could take down my mask), and then John edited the 3-day process together for you guys. The video is on the long side, but I promise to keep you entertained with helpful tips and frantic faces. (Nearly everything you see is the first - and only - take, and sometimes it shows, bahaha.)
Enjoy:
[ETA: Sorry for the sound issues around the 2-3 minute mark: we left the ceiling fan on so it sounds like I'm in a windstorm, ha.]
Helpful Extras:
- I forgot to mention that if you have a really small area to patch - like less than 3 inches - then instead of cutting a new piece of drywall you can use one of these kits:
It's basically a stick-on piece of tape that you cover with drywall compound. After that you'll follow the same steps I show to wet sand and texture, but this will save you the steps of adding the backer wood & cutting drywall. Be aware the tape in these kits is thicker than regular drywall tape, though, and will leave a raised bump over the entire patch, not just the edges. That means you'll need to feather out the drywall mud much farther to try to hide the bump.
- The mystery drill bit is called a Drywall Screw Setter, and costs less than $3 on Amazon. Definitely worth it when you're working with drywall.
I hope this helps some of you out there! Let me know in the comments what you'd like to see us fix next - maybe something you've been waiting to tackle in your own home?
You can put all our designs on any color shirt you like, and they are ridiculously soft without being too thin. (I wear geek tees every day, but pulling these on last week to film was heavenly. Ahhhh.) Plus the designs don't wash off or fade like I've had others do in the past!