Friday, October 28, 2022

Our 2022 Haunted Mansion Halloween: FULL WALKTHROUGH REVEAL

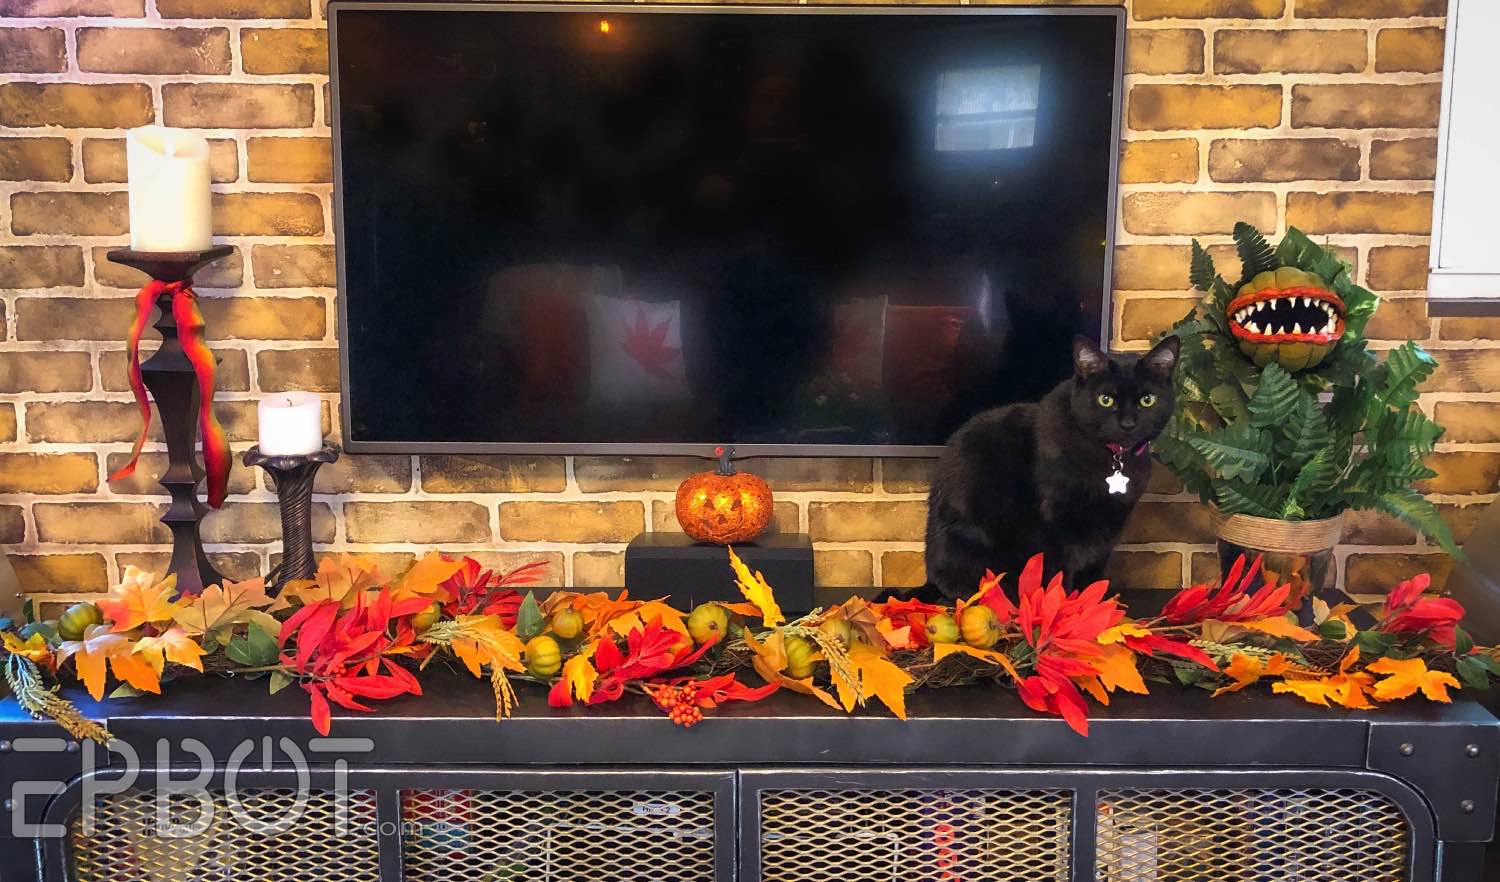
Welcome, fooolish mortals! Our Haunted Mansion Halloween is ready for its swinging wake, and there's no turning back now. Ready to see?

(EEEEEEEEE)

Our tour begins here, with this video:


What's that? You want a few dozen more pretty photos from every conceivable angle, both day and night?

Well, I mean, if you insist...
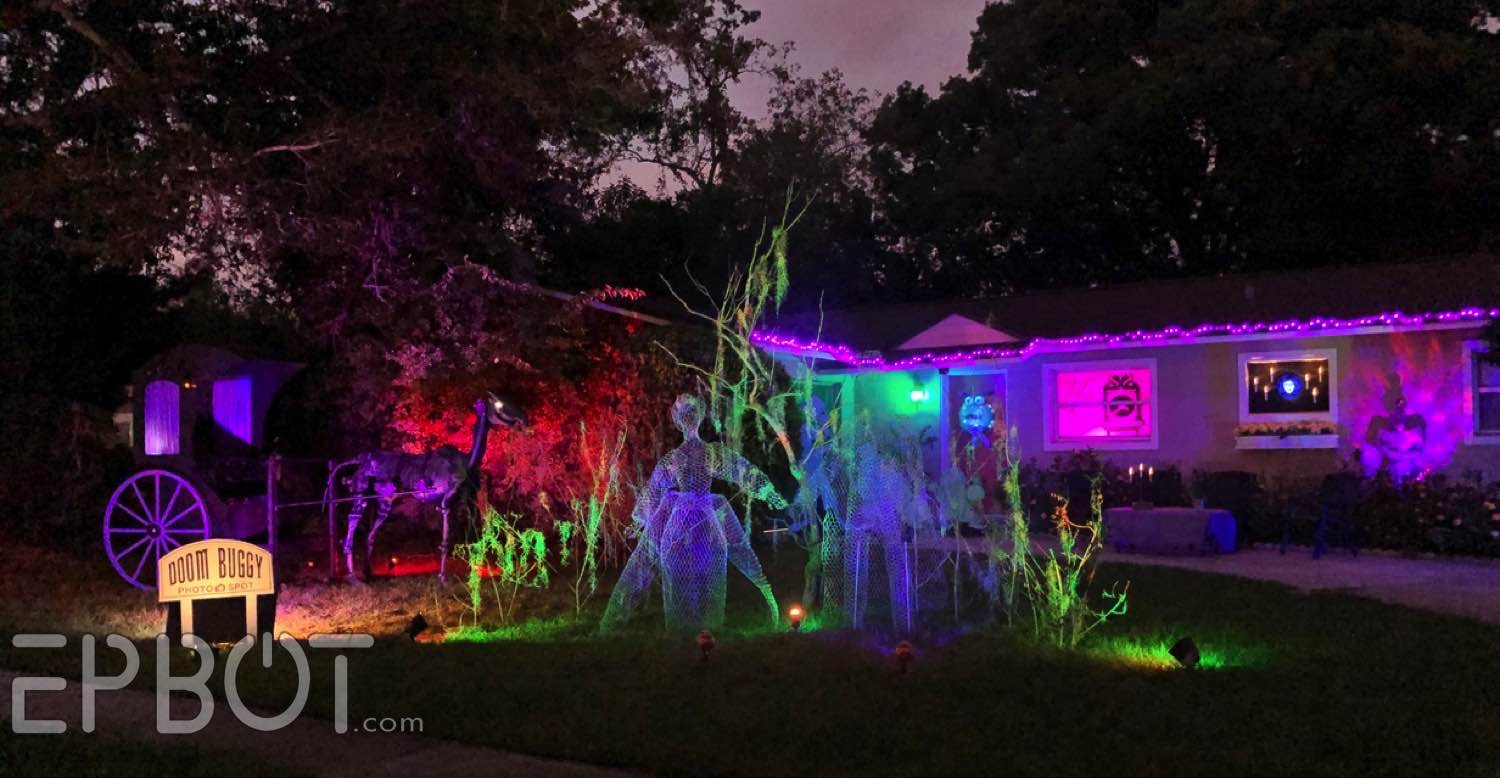
Here's the nighttime panorama from the street, I'm in love with all the colors:


And here's the transformation from day to night:


OoooOOOooh.

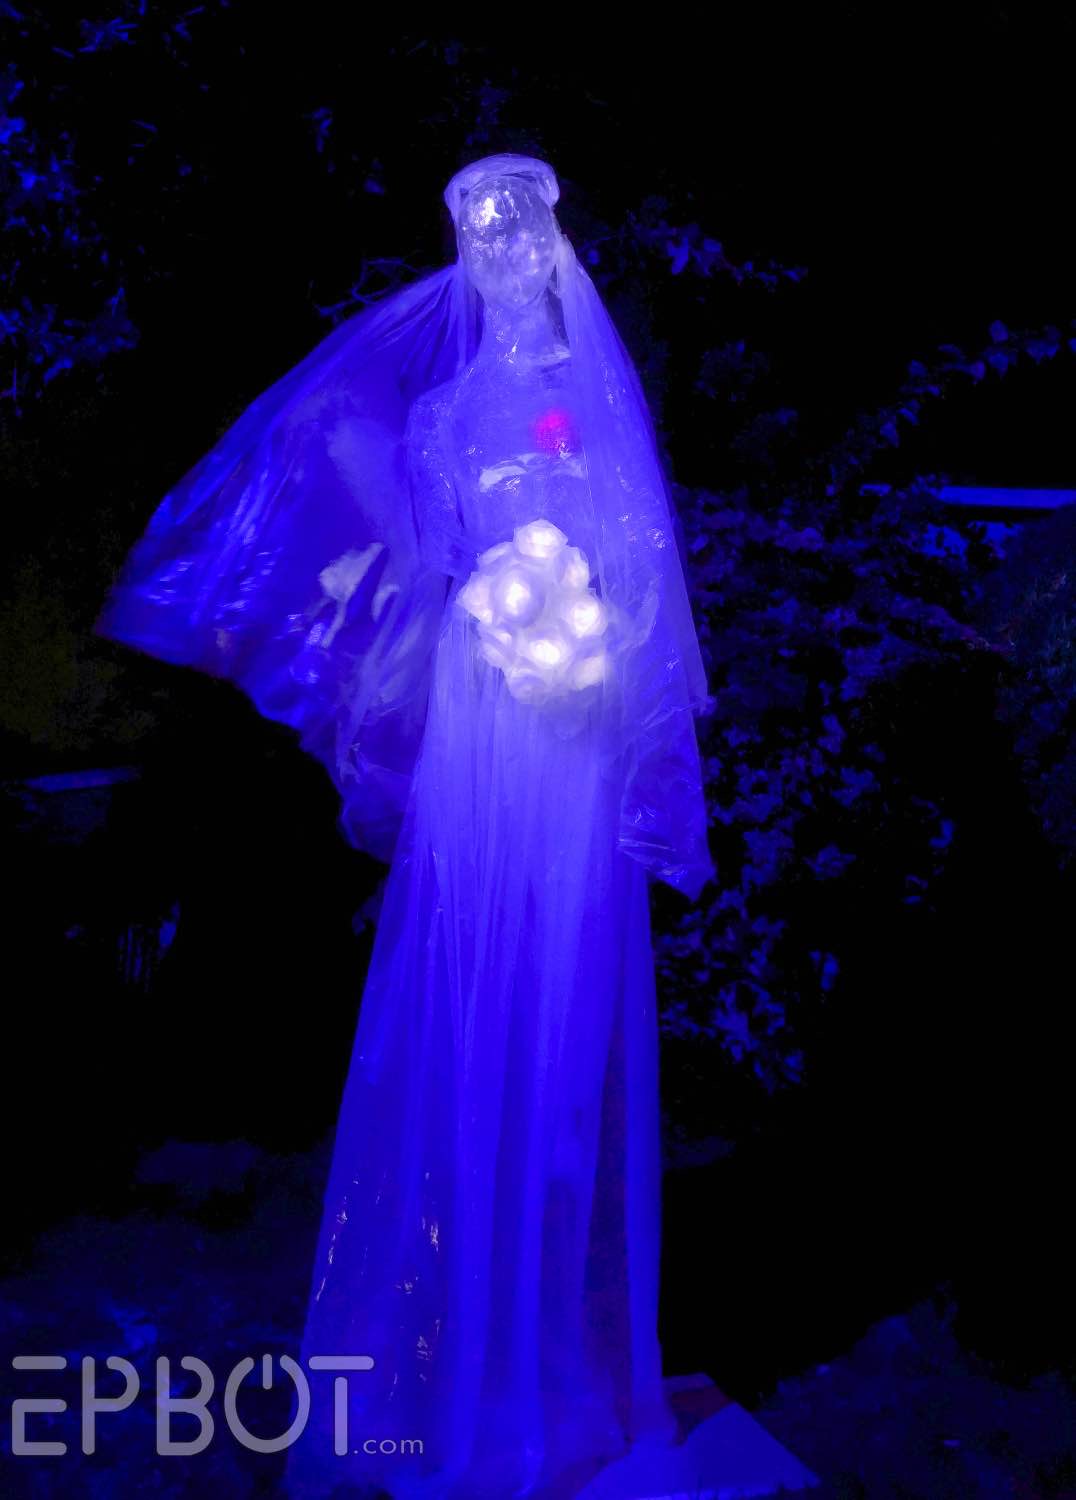
To the right we have the bride and singing busts:


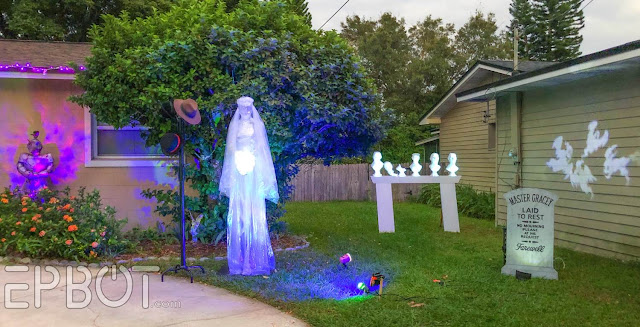
We added a hat stand by the bride as a nod to her dearly departed husbands.


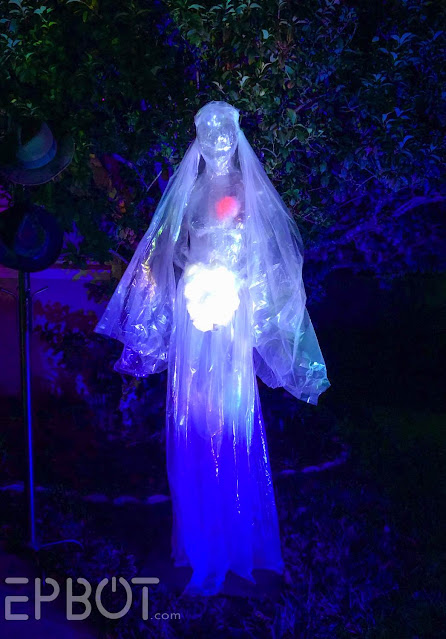
The bride is absolutely stunning at night, especially since we added a small fan to blow her veil around.

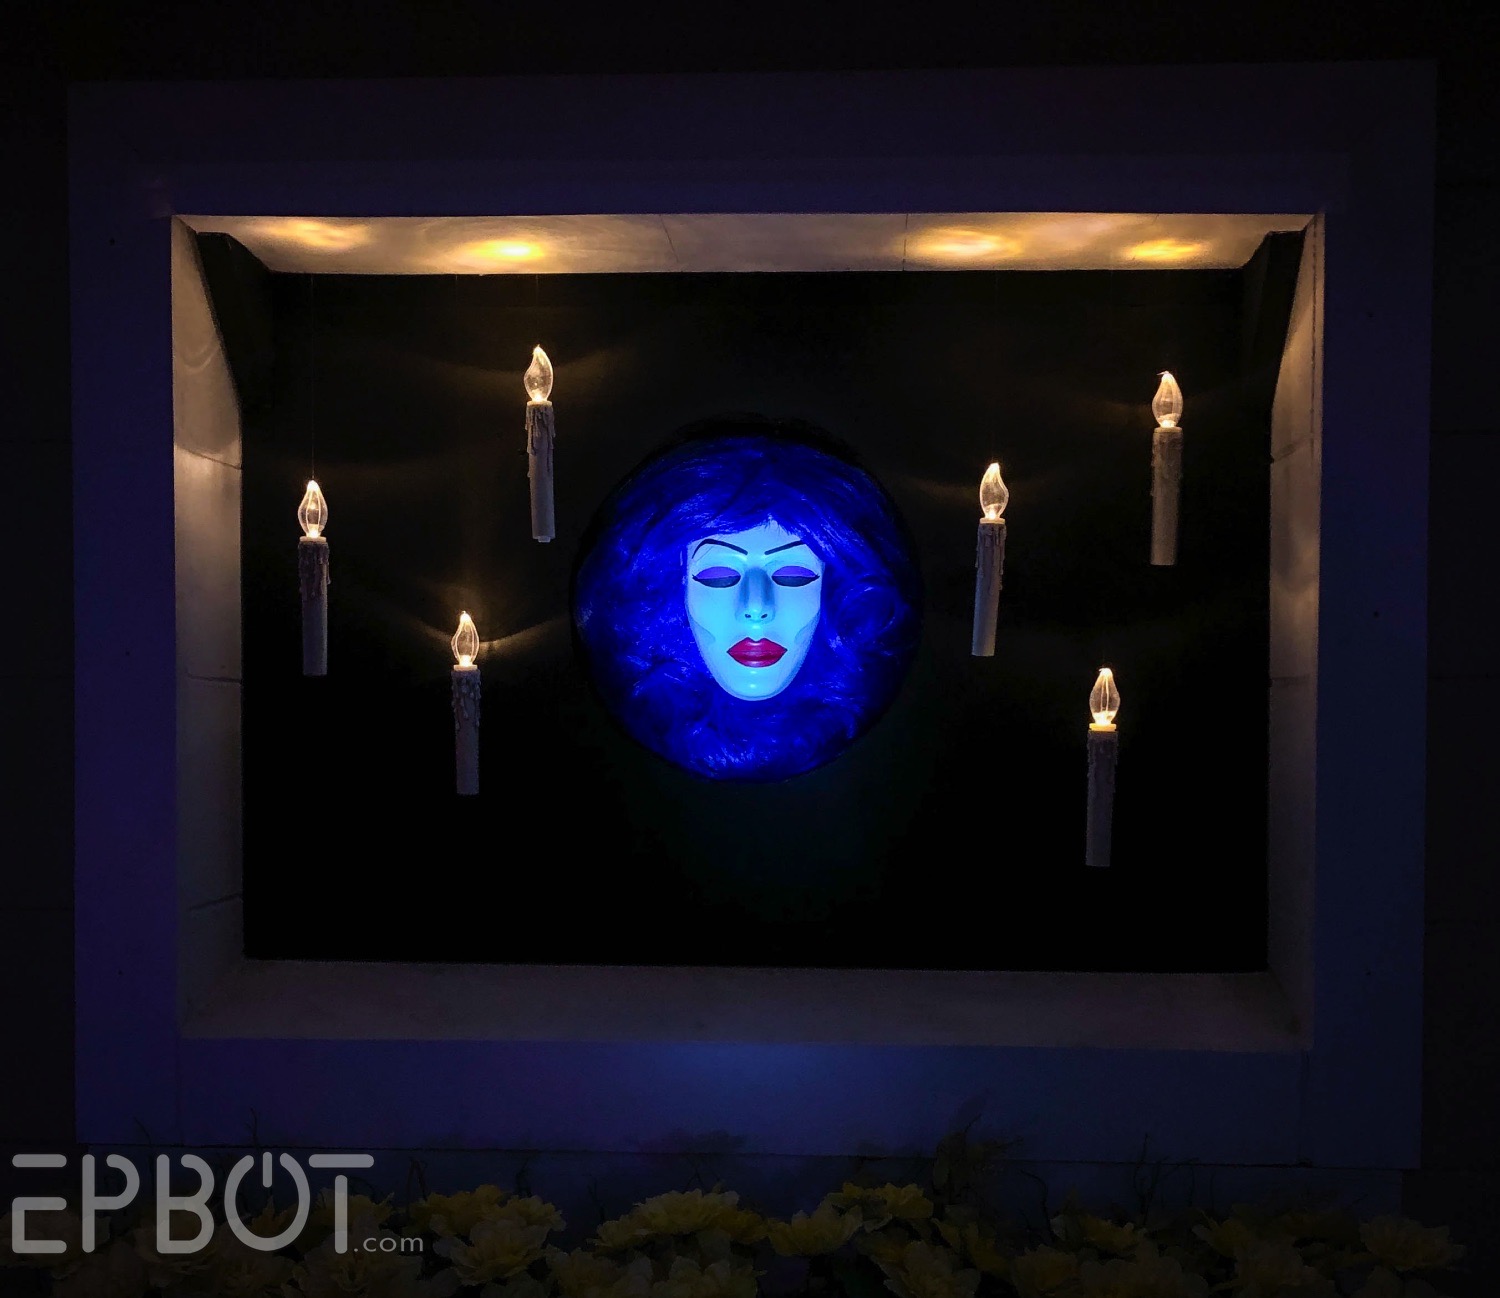
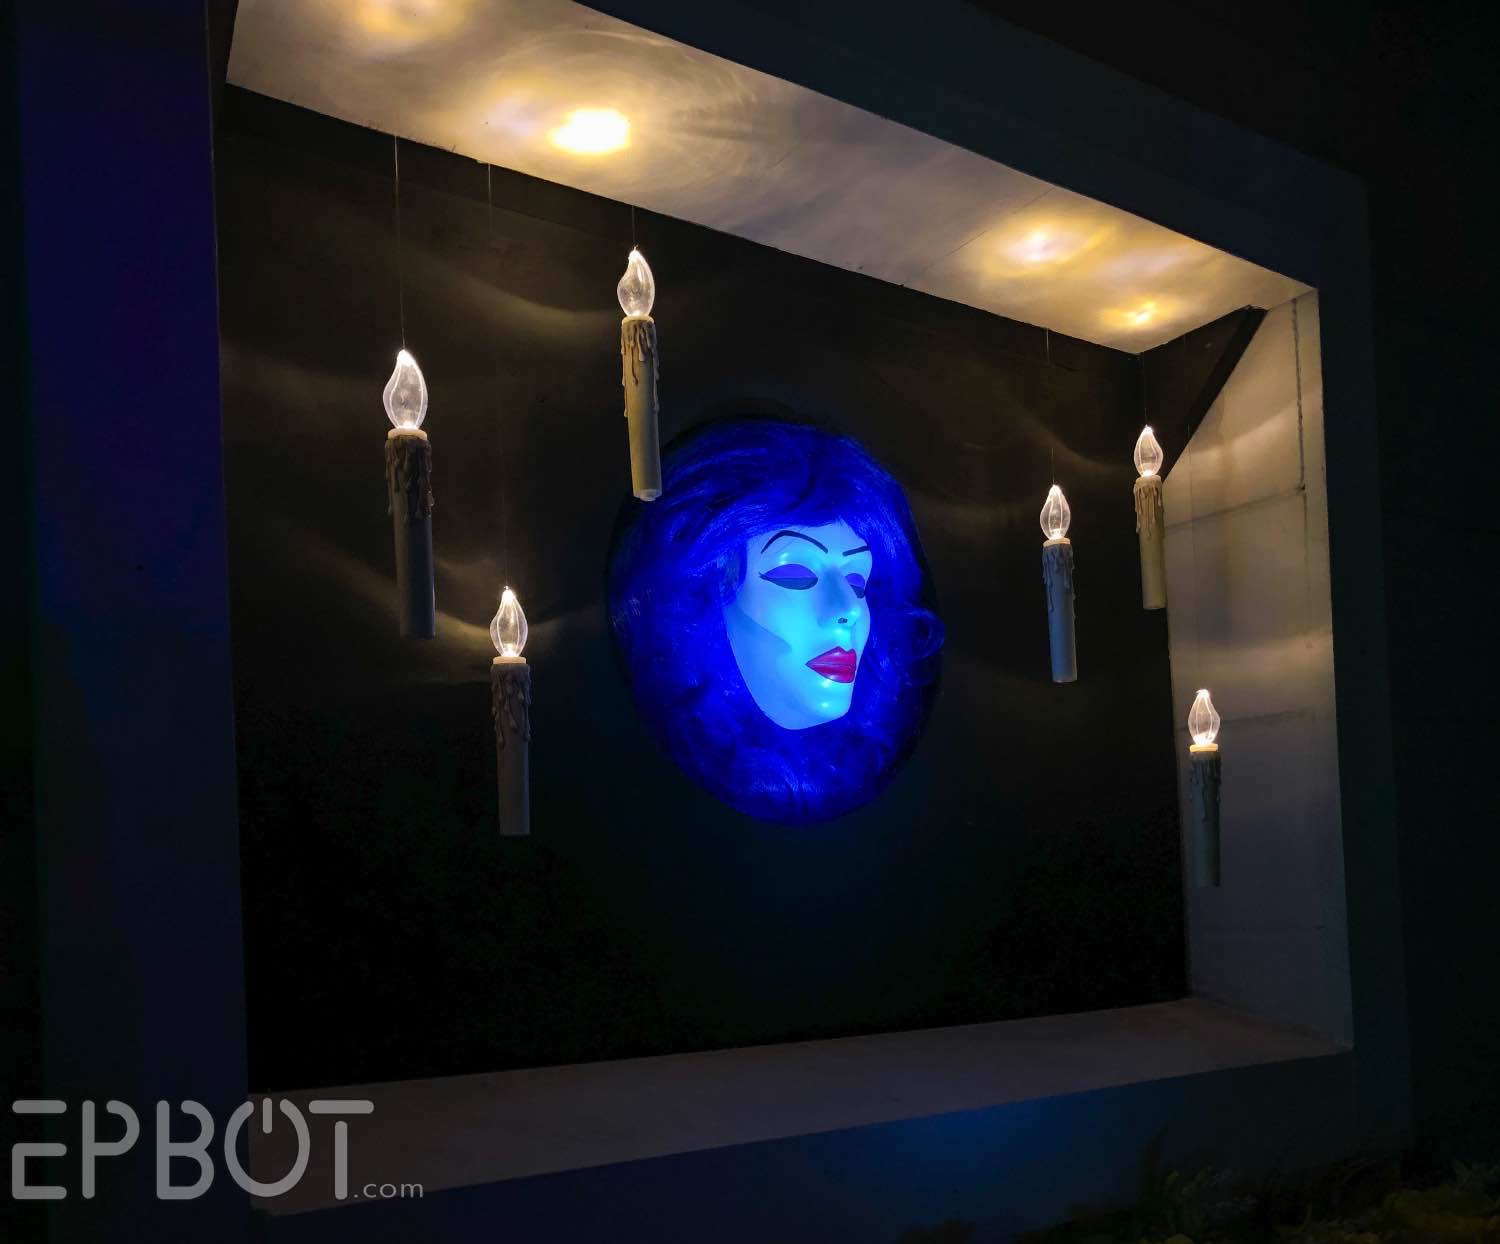
Amazingly you can see the singing busts even while it's light out:

Tuesday, October 25, 2022

Haunted Mansion Halloween: DIY Singing Busts!

I don't want to alarm anyone, friends, but Halloween is less than a week away. Have you watched all the spooky movies? Had enough pumpkin-spiced things? Glittered your bat wings? I'm just saying, this is the week to EMBRACE YOUR SPOOP.  

(To that point, I'm currently wearing gold foil stars-and-moons leggings for the first time ever. John declared them "distracting." MISSION ACCOMPLISHED.)

Now let's get to my most requested - and ironically, easiest - tutorial of all our Haunted Mansion builds: the singing busts. 

Yes, this is in our yard.  Honest.

This DIY is so simple you're about to call us big ol' cheaters - but remember, you can cheat, too. I can show you the worrrrrrld... of cheater DIYs. Just keep scrolling.

While the build itself is cheap and easy, you are going to need a digital projector, which is a definite cost. I'm told you can get holiday window projectors for as little as $30, but make sure you can plug in a USB to supply your own video.

John and I have a fancier projector that plugs into a laptop, left over from my book tour days, which gets a lot of crafting use. So if you make a lot of large signs, props, etc, it's worth the investment.

Right, let's get to this oh-so-easy build. Ready?

1) Find a Singing Busts video on Youtube. (We used this one.) Project it onto a large piece of pink insulation foam, backing up until they're the size you want.


2) Trace
 

This is tricky because so much of the busts are in shadow, but do your best to fill in where the heads *should* be.

3) Tweak your outlines 'til you're happy:


My bases were super wonky, so I went over them with a paper template to make them more symmetrical.


4) Cut Using A Long Craft Blade


Remember to leave the bottom ledge, so the busts are all connected on one piece of foam! This will keep the spacing right.

Also try to cut all the way through with the blade in one go, for smoother edges.

5) Paint The Fronts White

Friday, October 21, 2022

Ready To Have A Ball? Let's Make A Floating Madam Leota Head For About $20!

Happy Friday, friends! We made it through another week. And in John's and my case, also another Haunted Mansion build for Halloween!

This one took a lot of trial and error, shopping, and going back to the sketch pad before we landed on something we really like. In the end it's actually a fairly simple build, so I hope our pain is someone's gain out there.

First, a peek at the end result:


Pretty cool, right? This is one of our front windows facing the street, and she looks phenomenal from a distance.

She also only cost us about $14, since we already had the candles and pink foam. Your cost shouldn't be much more than that, especially if you have foam leftover from other projects. (Have I convinced you to buy pink insulation foam yet? It's a crafter's DREAM, y'all.)

Besides the pink foam you'll also need a plain white mask, like this:

This one is $4 at Spirit: Halloween, and the best face shape we could find.

... and a blue wig:


This one from Walmart is the perfect color, and by far the best price we found.

Start by backing the mask's eyes (and mouth, if needed) with thin white craft foam:


Next use craft paints to give her a ghostly teal base and some shading:

That's the hardest part, and I promise it won't matter if it's a bit rough.

Next add her lips, eyes, and brows:


I based my face on the incredible work of Katie at FreshCoastFandom, btw, who is a must follow on Instagram:

Tuesday, October 18, 2022

New Haunted Mansion DIY: Our Victorian Style Doom Buggy!

Happy Tuesday, clever mortals!

Quick question: where did October go?! EEP.

With Halloween coming at us like a dark horse (heheheh foreshadowing humor), John and I have several builds going at once. We hustled to finish our Doom Buggy for y'all yesterday, though, because this beauty needs her own debut post.

Ready?


Ta-daaa!

This is before we turned on the fog machine, so keep going for more spook-taculor glamour shots.

We modeled our Doom Buggy after a Victorian hansom cab, which looks like this:


This let us A) take some artistic license with the ride's design, and B) re-use Tiny Tim, our beloved thestral. (Tim insists on coming out each year to play.)

Plus I've wanted to make a vehicle photo op for years now, because EVERYONE likes climbing into cool vehicles and pretending to drive. That's just science.

The Buggy is our most expensive Mansion build, because the cost of plywood right now is scarier than our ghost bride. (It was over $100 for the ply and 2X4s.) All told the Buggy was still less than $200 for everything, though, since we already had the horse. And happily John sold a few things to make room in the garage, so it was an even trade.

We started with a pencil sketch and lots of conversation, since my brain doesn't work in 3D. This makes it an uphill battle for John every project, but eventually we (usually) get there!


The lighter lines are my own mods after we talked through things like head space, safety, and lighting.

What I lack in spatial visualization John has in spades, because that sketch is literally all he used to build the entire Buggy. No measurements, he just... winged it. Boggles my mind, y'all.

He started with this:


Which he then doubled, and then connected the two sides together:


If you're not already impressed with John, please note the TINY SPACE he has to work in.

PHENOMENAL COSMIC POWERS

....iiiittty bitty garage space.


Next he clad everything in plywood:


And at this point we dragged it outside to assess.


We also checked the proportions with Tim and a volunteer driver:


I wasn't wild about the top curve of the buggy, so we cut that down:

Friday, October 14, 2022

We Made A Packing Tape Ghost Bride From Haunted Mansion!

Happy Friday, friends!

So far for our Haunted Mansion Halloween we've made ghostly ballroom dancers and the three hitchhiking ghosts... but of course we need MORE ghosts. So next on my list is the Bride. (Or Constance, to her victims.)

I'll warn you purists now that our bride is not park accurate, old or new, though we did include a beating red heart as a nod to the original.

And y'all.

SHE PRETTY:


Yesss. Look at her. LOOK AT HERRRR

She also cost very little to make, since she's made almost entirely of packing tape and clear plastic drop cloths.  

C'mon, I'll show you how!

If you've ever made a duct-tape dress form then you can make a packing tape ghost; the method is almost identical.


I used the same mannequin torso from our chicken wire ghosts for my form, but you could use a brave friend instead. Just make sure they're wearing a t-shirt you can cut up, then cover THAT with the plastic wrap before starting with the actual tape. (So the shirt won't stick to the tape.)

I recommend a mannequin if you can get one, though; it's easier and safer.

Start with one layer of plastic wrap, then start layering on the packing tape.


You want a minimum of 3 layers. I did about 4, which took a roll and a half of packing tape.

The criss-crossing of tape and plastic wrap underneath gives a really cool texture, almost like cracked ice:


(I'm already brain-storming how we can make a faux ice sculpture with this for Christmas. Drop me your suggestions on what we could make!)

Once your layers are done, cut a slit up the back to remove your mannequin:


Because I also wrapped the arms, I had to cut a big + sign to get the form out.

Remove the mannequin, then carefully tape the cut seams back together.


I'm seeing Gozer's bubble-wrap cat suit here. "ARE YOU A GOD?"

Ahem.

Repeat this process with a Styrofoam head, then tape the head in place:

Tuesday, October 11, 2022

I Decorated For Spooky Season! COME FALL WITH ME

Happy Tuesday, pumpkins!

Ew, wait, mental note: never call anyone "pumpkin" again. That is surprisingly creepy.

Uh...

Happy Tuesday, fleshy scarecrows!

 Much better.

So needless to say, I'm in a mood. A mood... OF SPOOP.  I blame those blasted, beautiful couch pillows I showed you last week:


John and I love these so much we decided the back room needed MORE Fall leaves. So we went to JoAnn's and bought a garland. 


Then I opened the Halloween craft bin to get my Pumpkin Head Babies, and realized some extra flowers would look great on the coffee table. Oooh, and wouldn't our old steampunk Jack O'Lantern be perfect back here?

Next thing I knew, I was decorating for Fall, y'all.

I refused to buy anything else, though, so lemme show you how I used what we already had to spread some Autumnal energy in our steampunk room, dining room, kitchen, and front sitting room. You're about to see a lot of past DIYs, let's see how many you remember!

Let the tour... BEGIN.

(Steam-punkin post here)

Starting with a rare daytime shot of our steampunk room.

Ah, let's see how many times Eva sneaks into my photos this post:


(Audrey II tutorial here)

"PAY ATTENTION TO MEEEE"

My main tip for seasonal decorating is to add rather than replace. Sprinkle a few pumpkins and florals around your existing decor, and it will automatically start to feel more like Fall.


I literally just added a single pumpkin here, ha. I love all the colors on this shelf, though.


And again, just a single Pumpkin Head Baby for a touch of 'Tumnal.
(Five points if you recognize those wine goblets! Hand sculpted by the amazing Kristi O)


My other two Pumpkin Head Babies are by the velvet chairs:


(I realize that red pillow is adding nothing stylistically, but it's SOFT and I LIKE IT, dangit.)

Then over on the coffee ta... Eva, we can totally see you.

Friday, October 7, 2022

We Made The Haunted Mansion Hitchhiking Ghosts!

Greetings, mischievous mortals! John and I are finally well-rested and back to our Haunted Mansion Halloween builds with high spirits. (If you missed our ghostly ballroom dancers, click here!)

Today I'll walk you through our build of those beloved cling-ons, the Hitchhiking Ghosts.


My favorite reference art of these three is by Doodleman Dan, an indie artist I've featured here before and know from local cons. Unfortunately his art has been stolen and sold by Etsy scammers, so I contacted Dan for permission first to use this, and also purchased his digital files, so he'd be paid. Even if it's just for a personal project, I always want to do right by the indie artists out there - and here's Dan's Etsy shop so you can do the same. (Plus you're really going to want to see his Figment & Slimer stickers, ermergersh. Bet you can tell which ones I already purchased. :D)

Now, on to the build!

First we base-coated a sheet of pink insulation foam in "Tantalizing Teal," a Sherwin Williams color we matched in a cheaper Lowe's paint.


 Next John worked some digital magic to fit all 3 ghosts onto a single 4X8 sheet of foam, as well as extending and detaching their arms:


  I traced all the lines in pencil:


Then John began cutting them out with a large craft blade:

Tuesday, October 4, 2022

It Rocked Us More Like A Tropical Storm, But We Still Need A Nap


::runs in::

Y'ALL.


WOOT WOOT

Also I discovered a new market the greeting card companies should really get in on:


Just sayin, Hallmark. This could be a gold mine.

(Also is that not the best photo of Eva? John caught her mid-yawn.)

John and I were extremely fortunate during hurricane Ian; no damage other than a few fences blown over, no injuries, and all our local friends are also safe and relatively unscathed. Incredibly grateful for that, especially as we've been seeing the disastrous flooding just minutes away - not to mention the devastation on the coast.

We do live in an old neighborhood with old power lines, though, so we had no electricity from Wednesday through Sunday. Speaking as an introverted hermit agoraphobe who runs on vampire hours, it was surprisingly draining bouncing between friends' houses while trying to work, check up on loved ones, procure Low Fodmap food I can eat, get any sleep, etc. No complaints, because we felt so much love and support, but we are exhausted.

Happily we're almost back to pre-storm conditions: fridge and freezer dumped, disinfected, and re-stocked, yards cleared, fences repaired, laundry done. We're still waiting on internet, but I'm managing short bursts by tethering to my phone.

Best of all, with power restored we can pick up where we left off with our Haunted Mansion builds! I'd hoped to have a full reveal today of our Hitchhiking Ghosts, but I'll have to leave you in suspense a few more days. We need a little more time to both work and recover, and I know y'all will be cool about it, so thanks for that.

I hope you have a wonderful week, my friend, and I'm sending extra hugs to everyone affected by the hurricane. If you're looking to donate to an on-the-ground disaster relief charity then I recommend Convoy of Hope. It's highly rated, recommended by SharonSaysSo, and the one I personally gave to this weekend.

Now, before I go, let's announce September's Squeegineer winners!

Congrats to Elizabeth D. and Sarah P., and please check your inboxes for a message from John, so you can choose your prizes.


Speaking of, I'm hoping one of you might choose this chonker of a resin bracelet as your prize, since 'tis the season and all. (You can see me wearing it here.) If not then I'll be doing a separate give-away with it soon, tho, so the rest of you stay tuned!