Happy Friday, friends! We made it through another week. And in John's and my case, also another Haunted Mansion build for Halloween!
This one took a lot of trial and error, shopping, and going back to the sketch pad before we landed on something we really like. In the end it's actually a fairly simple build, so I hope our pain is someone's gain out there.
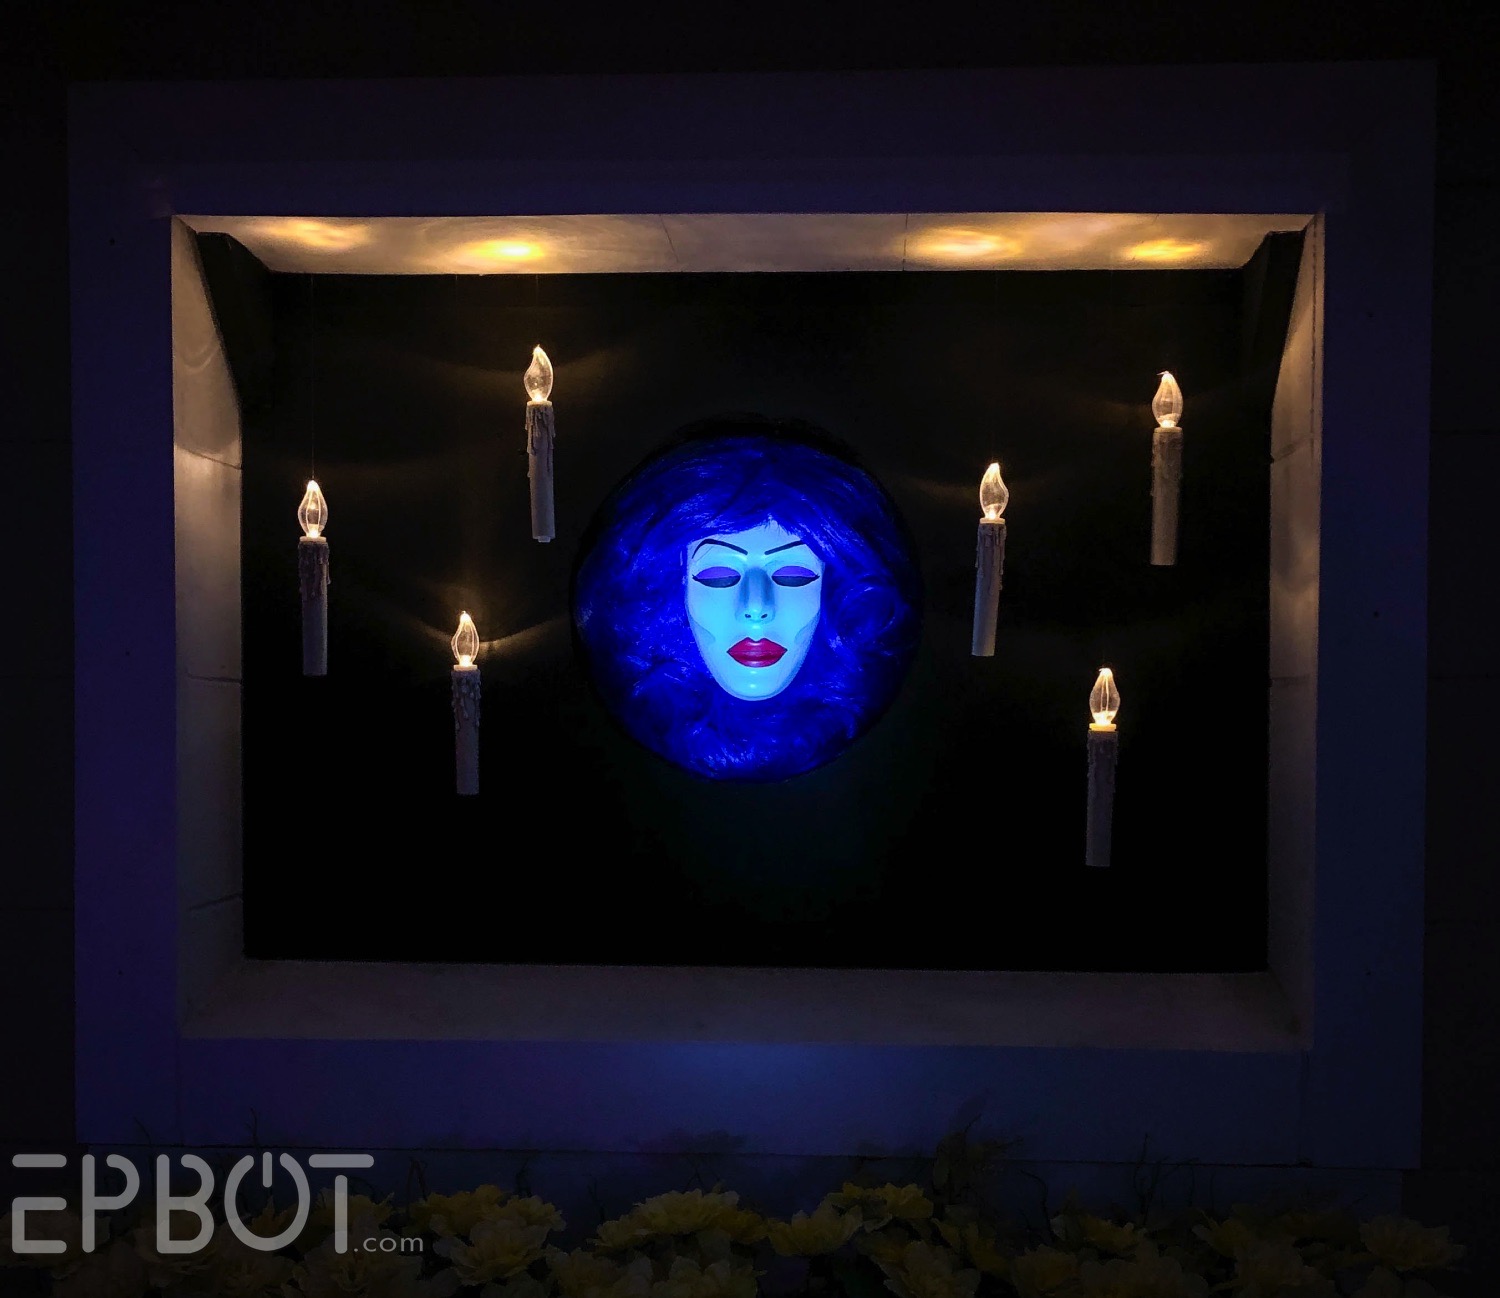
First, a peek at the end result:


Pretty cool, right? This is one of our front windows facing the street, and she looks phenomenal from a distance.
She also only cost us about $14, since we already had the candles and pink foam. Your cost shouldn't be much more than that, especially if you have foam leftover from other projects. (Have I convinced you to buy pink insulation foam yet? It's a crafter's DREAM, y'all.)
Besides the pink foam you'll also need a plain white mask, like this:
This one is $4 at Spirit: Halloween, and the best face shape we could find.
... and a blue wig:
This one from Walmart is the perfect color, and by far the best price we found.
Start by backing the mask's eyes (and mouth, if needed) with thin white craft foam:

Next use craft paints to give her a ghostly teal base and some shading:

That's the hardest part, and I promise it won't matter if it's a bit rough.
Next add her lips, eyes, and brows:

I based my face on the incredible work of Katie at FreshCoastFandom, btw, who is a must follow on Instagram:

Her wreaths are the stuff of stardust and dreams, so good.
My main hurdle in making a floating Leota head was her crystal ball. Sure, you can buy an acrylic globe on Amazon, but it costs $60. Heeeeeeck no. So my challenge became faking the ball instead.
Here's how we did that:
We cut a head-sized hole out of our pink insulation foam, then backed it with a thinner sheet of foam, to create a small recess.
We painted all the foam flat black, then stapled the blue wig into the hole:
I know that doesn't sound like it'll work, but it totally works.
Next I tucked the mask into the wig, arranging the bangs and curls to hide the masks' edges.
I smoothed as much of the hair inside the edge of foam circle as possible, and used a few bobby pins to keep it neat. The recess helps hold the hair in that perfect circle.
Originally we planned to have Leota float inside a wreath:

But y'all know how I struggle with wreaths, and it felt too complicated.
So we ditched the wreath and switched to floating candles, which happily we already had in our Christmas bins in the garage. Somewhere. (Cut to angry Muppet sounds as we search through giant bins, ha.)
We needed something to hang the candles from, of course, so next John hot-glued a ceiling ledge and supports in place, all while looking especially debonair:
There's just so much to love about this photo.
More painting later, and we had this:
I painted the top white to match the outside window box.
We used a big needle to feed the clear fishing lines through the foam, then secured the lines with screws on top:
At this point we did more experimenting with lighting, but again, my original plan... didn't pan out:
Ehhhhhh no.
In the ride Madam Leota's face is projected, so it makes sense that the best lighting is a direct spotlight:
We used a small flashlight to get an almost perfect circle of light, which makes our face look projected, too. You keep expecting her to open her eyes and ask you to ring a bell from somewhere beyond. ;)
Installation was easy; we just pushed the foam directly into the window box:
Since it's the same size as the window it's quite snug; we have to pry it out with a screwdriver to remove it.
The black bar on the window box is the flashlight/spotlight, taped in place on a small piece of wood. John maneuvered it to perfectly light Leota's face:
I'm showing you all these builds as they're MOSTLY done, btw. It's very possible I'll add something below Leota, like her spell book or a few pillar candles... or at least a raven, if I can find one! I expect we'll spend the last week before Halloween going around and plussing up anything we have time for, like adding reins on the Doom Buggy, and dimming the Bride's bouquet so it shows better in photos.
Side view so you can appreciate the 3D-ness of it all.
And a lil close-up so you can see my rough contouring really doesn't matter.
And that's how we got a head (ba dum cha) on our Mansion builds! I hope you had fun seeing her come together.
The weather has FINALLY started to cool here in Florida, so John and I have been outside this week every night at dusk, setting up the yard and reveling in the sensation of below-80 temperatures. Ahhh.
SNEAK PEEK:
You can peep Leota in her window over the ghost dancer's shoulder. It's not so blown out IRL; you can actually see her face!
Our street is lined with giant piles of dead branches from Hurricane Ian, so we've been creating spooky hedges with them... and I am OBSESSED. We're going to add hanging moss off all the dead things, which will catch the colorful lights and look even more incredible, hnnnng.
We still have a ways to go, but the finish line is in sight, and I am so, SO excited. I hope you are, too, and that you'll, ahem... hurry back... for our final tour!
*****
In case you missed them, here are all the Haunted Mansion elements John and I've built so far:
-
Ride-Able Doom Buggy *****
It's getting near the end of the month, have you entered my Squeegineer give-away yet? Winners get to choose their prizes from the increasingly random things I
find in my office closet, like these Haunted Mansion bat necklaces:
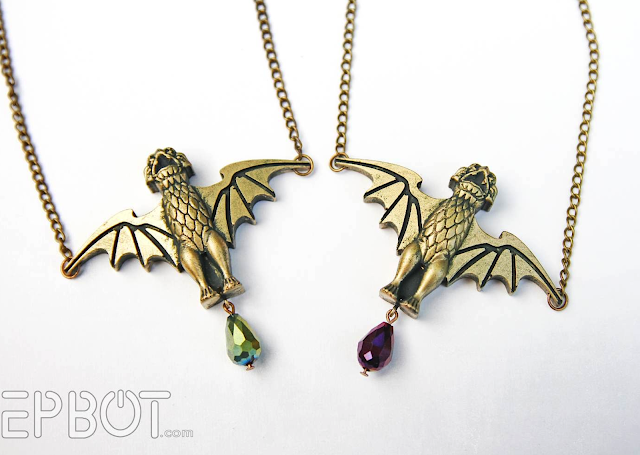
Everyone who donates any amount to Epbot via Paypal is automatically entered each month, or you can enter for free by e-mail! Check out the details and prize galleries here.


As a child, riding through the Haunted Mansion, Madam Leota made me so anxious. I was afraid she was coming out of there! o.O
ReplyDelete-Barbara Anne
I can't handle how amazing and talented you both are - this looks freaking brilliant! The lighting is so impressive on all the props- envy of the neighborhood!
ReplyDelete...is it weird that I think Leota looks a little Frankenfurter-y? I love it! Great simulation of projection!
ReplyDeleteI'm glad to see that someone else thought so too! :-D
DeleteOh yes, Leota is giving us some fierce Drag energy here, haha
DeleteAren't there musical instruments floating around Madam Leota? If you could find some baby sized trumpets and tambourines and paint them with your florescent paint they would be even more Haunted Mansion. But she looks pretty fabulous already. Its so fun to watch all this creativity.
ReplyDeleteIt's so fun seeing things coming together...can't wait for the final reveal!
ReplyDeleteI love that you took downed branches and made hedges! That's the ultimate recycling! Can't wait to see the finished product.
ReplyDeletehello Jen & John - this isnt restricted to just this project (although I love it!) but as someone who loves crafting/painting, etc, and just got a cat, I often find myself getting anxious when I am working on a craft that my cat will step in/get into a craft supply & get hurt/sick from it. Also she loves to tear things off the wall once I do make them. Do you have any advice/strategies for crafting & cat-owning? (I know an obvious answer is to do it in a separate room, but I live in a small apartment & she goes nuts trying to get into the other room if I lock her out- I think she has cat-anxiety, too, lol)
ReplyDeletelove the blog as always <3
Hiya! My best advice for training cats is to just be there, around the thing you want them to avoid, and make a sharp sound when they get too close. I say "HEY" or "NOPE" and my girls have learned that means to stop doing what they're doing. Also give them a safe spot near you, like a bed or a box, so they can watch/satisfy their curiosity, since cats are VERY stubborn, ha. Locking them in another room never works for me; best to find a safe way to let them be nearby.
DeleteOf course when you're leaving something dangerous out then you'll need to throw a towel over the thing or box it up, but for the most part I've found that if *I'm* not there, the cats very quickly lose interest. They mostly want to be where the action is.
As for tearing things off the wall, I'd try a couple new toys - or remove any tempting dangling things from the wall, since no cat can resist those!
Hope that helps, and congrats on your new kitty!
This advice is also extremely appropriate for those of us crafters/seamstresses with Pugs! Pugs were bred to be companions and pretty much nothing else, so if they're separated from you for too long it disrupts their entire worldview. If I need to work in my studio, my Vulcan has to be here to distract him, or I have to sneak away when he's sound asleep.
DeleteAlso, while they may not climb up onto your projects, their fur WILL find a way to get up all over it. IT IS KNOWN.
Your Pal,
Storm the Klingon
PS As I typed this, "Mickey Mouse" by SPARKS, one of the greatest New Wave bands of all time, started playing! Check it out, I swear it's AWESOME.
So, I meant to mention: we welcomed our latest Pug Rescue, Rocky, just over three months ago, and he is still learning our Strange Ways. Setting him up close by to "supervise" while being out of the way has helped, i.e., "No, Rocky, you can't get up on the couch right now, Mama's got her sewing stuff all over it. Here, I'll set your bed down here next to me, where I can scritch your belly. Cool? Cool" and also using a sharper voice to loudly say "HEY! NO! LEAVE IT!" if he's screwing around too much.
DeleteOKthxbye
Storm the Klingon
I don't know anything about Disneyworld and wouldn't recognize any of these things as specific references if you didn't tell me, but even without context they are all super cool! Halloween goals
ReplyDeleteMadam Leota totally looks like she belongs in a John Waters' movie!
ReplyDeleteAs a suggestion, next time you need to contour weird colours, try eyeshadow and spray sealer. You get the ease of using an actual powder product designed for that type of thing, and the cool colours available as well
ReplyDelete